
Builders' Forum |
|
| ↓ Scroll to Last Comment ↓ | Forum Guidelines | Builders' Forum | |
Chesapeake 18 - First time poster - Remote logistics /material help
I have settled in on the Chesapeake 18 kit and wanted to get a little advice on additional materials that may be needed. I live in a remote section of Alaska so if I run out of something it will take about 3 weeks to have something delivered. There are no stores, roads, etc here so even simple things like sandpaper etc are an issue. I have plenty of clamps, sandpaper, etc. but did any of you need additional materials or supplies to complete your project?
Some items I can't have delivered like epoxy, so I must pick it up when I am in town. It's a $500 round trip flight into town if I must pick up something in person. I have the epoxy issue figured out but have not decided on a varnish yet. Anything else I should be considering that would be a hazmat issue? Any recommendation on varnish I should consider? 2 gallons epoxy and 0.75 gallons hardener plenty?
Were there any add on's you highly recommend in addition to the kit that I should consider now? I am going to be in the lower 48 till early Dec so I am trying to make sure I can have everything either picked up or delivered by mid-December.
The good news is I have an absolute gorgeous area to use the kayak (as long as the bears don't destroy it).
9 replies:
RE: Chesapeake 18 - First time poster - Remote logistics /material help
if you are buying the kit inclusive of the epoxy, you will have enough epoxy and all the regular materials (precut wood and flbreglass, etc) you need for the basic construction. so there are three categories of things to think about: 1) stuff you want that's needed to finish the boat that becomes part of the boat that does not come in the kit and 2) building consumables like sandpaper, brushes, mixing sticks, etc).
on item # 1 things that become part of the boat that does not come with the kit: assuming you are painting the hull and varnishing the deck....1 quart of paint of your favorite color and 1 quart of varnish. if you want perimeter lines on your boat, you will need cordage for that, if you want carrying toggles, you need to order that exta. a lot of folks like to upgrade the seat and buy a seperate seat from what comes with the kit. if you want a rubstrip which i almost always do, you will need to buy a rubstrip kit. contact cement, silicone glue. i have built a lot of CLC kayaks and the list i am giving you for item # 1 is pretty standard.
on item # 2 consumables: brushes (box of 2 inch foam), box or two of disposable gloves , can of denatured alcohol, disposable plastic cups and large popsicle sticks for mixing epoxy. sandpaper. foam rollers for epoxy
on item # 3: ...some of the more esoteric tools i find useful....a solder gun with a rope cutting edge to cut cordage and strapping material. a 1/2 inch round router bit (and the router) to round over the sheer clamps and the coaming (of course you will need drill, saw, rasp/file).
i hope this helps...others will have suggestions as well.
h
RE: Chesapeake 18 - First time poster - Remote logistics /material help
Thank you Hspira and Poleman
Hspira - They can't ship the epoxy with the kit here because it has to be sent by ground transportation.
I am looking at different seat options but have not settled on anything yet. The main thing I am having difficulty with currently is what to do on the bottom of the kayak. The beaches here are all pretty rocky so I am looking at options for protection. I see West has a graphite powder option that I might pursue. Still researching it.
RE: Chesapeake 18 - First time poster - Remote logistics /material help
Wow, there's a logistical challenge, indeed. And a stimulus for being very inventive with workarounds, I'll bet.
Even in a less rocky area, my CLC canoe and sailboat keels show the dings of boat ramps, gravel, shell and now that I'm in New England, rocks. One thing that kayaker friends do is put Kevlar or Dynel rubstrips on their keels and I've wished for it at times, and CLC sells a kit:
They sell the kit of Dynel and graphite separate from the epoxy so it could be ordered for delivery. It would mean you maybe should increase the amount of epoxy you buy at the beginning, but it would defend the stem and keel from gouges.
I see you were thinking of 2 gallons of resin (and if you are getting MAS or other 2:1 epoxy that'd be 1 gallon of hardener) which is more than CLC sends with a kit, I think, so you should be good. That said, I'm not the best/neatest user of epoxy, so I've had to buy extra for each of my projects, above their kit provisions.
In the way of consumables, I go through rags or paper towels like mad, maybe because I'm not the neatest. Also, CLC now sells filleting bags that work better than the generic plastic bag w/ corner snipped off, and they're pretty cheap. A lapstitch boat like my skerry probably has more inches of filleting than a kayak, so it might not be as big a deal for you but I'd consider.
RE: Chesapeake 18 - First time poster - Remote logistics /material help
I also wanted to endorse the dynel rubstrips...it was one of the items i mentioned in my original list. they don't really need a lot of epoxy and your two gallons resin and one gallon of hardener should do the trick if you are reasonably careful with your epoxy work.
coming back to rub strips and protecting the boat. these kayaks while tough, are not really designed to be dragged the way a plastic kayak can be dragged. these boats are high-end fibreglass boats and fibreglass is not particularly resistant to abrasion....so a rubstrip is pretty important. you can also put a keel strip on like keel easy https://www.keeleazy.com/. that said, once you get the out of the boat, you need to carry it or use a little trolley/roller....minimal dragging in a nutshell
the rubstrip is there to protect you from the first foot or so of running it up on rocks or a boat ramp....it does not make the boat draggable over a rough surface.
if you need a boat that you want to simply drag up on a rough surface i would pause and consider a plastic boat.
there is also the concept of an 'expedition layup' which involves an extra layer or two of glass on the hull....it adds weight but allows the boat to take more of a beating before damage that would require an immediate repair...but again, even an expedition layup will quickly tear through if dragged repeatedly on a rough surface.
h
RE: Chesapeake 18 - First time poster - Remote logistics /material help
Hello Mr T.O.D, welcome to the club!
Lots of good advise above so I will just add a few things.
Consumables - As a first time builder, you will be amazed how quickyly you go through the consumable stuff. For home finances I use Quicken so my wife can tell what I spend on a boat down to the penny. I am an experienced builder and $200-$300 on consumables (excluding paint, varnish and epoxy) is pretty normal. This is my way of telling you to buy 2x what you think that you need. A few items that I did not see mentioned above: Tape - masking, fine line, strapping and clear packing all have uses. Chip Brushes - The wide 2-3" for wetting out glass and the narrow 1" for spreading thickened epoxy. Mixing Cups - These can be reused but eventually get messing and then thrown away. Paint/Epoxy stirs - I like the pop sickle stick shaped ones because they double as tools to do the filets. Disposable roller and/or paint trays - I pour mixed epoxy into these so that it does not cook off as fast.
Tools - You say that you have enough clamps and we all laugh. Every experienced builder KNOWS that you never have enough claps. Seriously, you will need someling like 40 just for the shear clamps on your 18' boat. Spring clamps work well for that but are pretty big to effectively clamp the hatch parts. Small/medium C clamps are better there. You will need a hand plane. CLC recommends the Stanley Low Angle but mine is crap. The Stanley Sweet Heart 60 1/2 is much better and the Lie Nielsen version of the same plane is top of the line. You will need a sharpening stone for the plane and a honing guide takes all the guess work out of it. I really like the little Bonzi hand saw that CLC sells for cutting out hatches and trimming along the deck. An 80 grit flap wheel in your drill is a huge help when it comes to cleaning up inside the cockpit coaming.
Boat Gear - I have two Chesapeakes, and they are wonderful paddling boats. If you will be paddling in waves, I would strongly advise adding s skeg. The CLC skej kit works well and is very robust. You can access the slot from above or below if you get a rock jammed in there.
Bottom - For your paddling local, I would recommend a second layer of glass over the bottom and up the sides a few inches above the chines. Also add the Dynel rub strips on bow and stern. I am not a fan of covering the bottom with the graphite epoxy slurry because it actually makes the epoxy softer.
Hints - 1. Clamps can dent your plywood. Prevent this by making 2" square wooden pads cut from paint stirs. Cover the pads with clear packing tape so that you do not glue them to the boat. 2. For working with epoxy, cut about 1/2 the length of brissles so the bruch will not hold as much epoxy. 3. Use the "Lazlo" method for assembling your cockpit coaming. 4. Use the Tape Trick to get a good neat straight line when you lay one layer of glass over another. Ask here about 3&4 when you reach that part of the build.
Good luck and have fun!

RE: Chesapeake 18 - First time poster - Remote logistics /material help
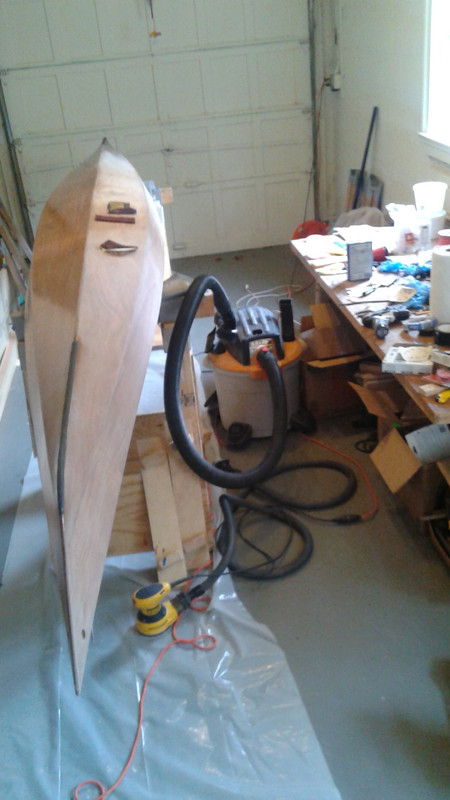
Thanks for the tips. Mark I had not even seen the retractable skeg option but I think it is probably a good fit for me. The lake is 40 miles long with mountains all around so there are times the crosswind would be an issue. Is there a post somewhere showing how you treated your bottom? The photo is about what I envisioned.
I have a few trips planned and get back mid December. That is when I plan to start on the build. I will definetely be back here with some questions I am sure. Thanks again for the tips everyone.
RE: Chesapeake 18 - First time poster - Remote logistics /material help
the rubstrip kit link is here and it has some pictures:
https://www.clcboats.com/modules/catalog/product.php?category_qn=boat-building-supplies-epoxy-fiberglass-plywood&subcat_qn=kayak-gear-accessories&code=kayak-rubstrip-kit
below is a picture of the bottom of one on my kayaks with rubstrips installed (black lines on the stem and stern). as you can see the rubstrip extends from the knuckle of the bow and stern and inward towards the center of the boat for abot 24 inches. the rubstrip really is just there to protect the keel line at the ends from abrasion against a boat ramp or running it up on shore. they were very well. my experience before using them is that it was very easy to abraid through the straight fibreglass at these pointy ends ....even if you had several layers of glass cloth. the rubstrip does not need to go much up the side of the boat as that is not where the abrasion is happening. so my strips are only a little over an inch wide.
RE: Chesapeake 18 - First time poster - Remote logistics /material help
If I could add one more thing to all the previous suggestions, it would be cabinet scrapers. I discovered these about half-way through my Peeler Skiff and was amazed at how they can smooth out cured expoxy. There's virtually no dust when you use scrappes and you can drastically reduce the amount of sanding time that's usually required. There was definitely a learing curve for using these, mostly about the technique required in sharpening them but it was so worth the effort. One recantagular scraper has eight edges (two on each of the four sides) so you can scrape for quite a while before you have to sharpen. Unlike sanding with a power tool, it's almost impossible to go too deep, a safety factor I really liked. There's mulitple videos online on how to use scrapers; you might want to check them out.
art smith


RE: Chesapeake 18 - First time poster - Remote logistics /material help
» Submitted by Polman, Dave - Wed, 10/21/20 » 9:11 PM
Hi -- So I'm in the process of building a Shearwater Sport-- so not the same boat as you... take that as you may...
I bought the "complete" kit and have found it to be adequate in most regards. I'm very near the varnishing stage now and the kit has been very complete. It appears that I will have enough epoxy with what came supplied. My kit came with "builders bundle" that had brushes, rollers, gloves etc. I have used all of those and had to buy more. Looking back I could have been more conservative and cleaned the brushes and reused gloves etc, but it's worth considering that you will likely use more of those consumables than you think you will.
Good luck with the kit. I have found the process to be extremely rewarding and I haven't even paddled the boat yet!
Dave.