Mastering Marine Varnish
FinishingCongratulations! You've just finished the assembly of a wood-epoxy composite boat.
Note the qualifier: "wood-epoxy composite." All of Chesapeake Light Craft's designs are built of wood, strengthened and protected by epoxy and fiberglass cloth. Applied with reasonable care, epoxy and fiberglass are clear, showing the wood beneath in all its natural splendor.

A pair of varnished Tenderly Dinghies.
Thus, you will be applying varnish onto epoxy, not bare wood. The techniques and materials are different when you are applying varnish over epoxy as opposed to bare wood.
That's right: No if's, and's, or but's, you've got to apply SOME sort of coating over the sanded epoxy.
The epoxy alone might LOOK kind of like varnish, and it's an extremely strong coating, yes. But ultraviolet light from the sun is epoxy's kryptonite. As much as you may be ready to launch after that last coat of epoxy cures, within a month or two outdoors, the unprotected epoxy will start to turn cloudy. Then it will oxidize and eventually crack. Protected with paint or varnish, the epoxy will last forever.
But won't a varnished boat be "more work to maintain?" Well, no, it really won't. You're looking at the wood through an extremely strong polymer coating of epoxy and fiberglass. Marine grade varnishes of the modern generation are basically clear paint from a chemical perspective. So marine varnish will hold up just as well as marine paint.
By the way, nearly everything discussed in this article is applies equally to marine paint finishes.
What are the disadvantages of an all-varnished finish? Well, varnish will hide nothing. Any construction boo-boos, scratches in the wood, ugly epoxy fillets, and so on will be even MORE pronounced beneath varnish. A builder intending to varnish will have to be fastidious, and this will add time to the construction process.
Many people mistakenly use the terms "varnish" and "stain" interchangeably. BEWARE!! They represent two completely different chemistries and techniques. "Staining" is something that is done to bare wood to change its color. If you stain your boat, you'll have to do it way back at the very beginning of the project, before assembly starts. And you'll need a special stain, one that is compatible with epoxy. That is tricky business, indeed.

Varnish, in contrast, is a clear coating that you apply over the epoxy at the end of the project. The varnish we prefer for all of our boats at CLC—going back 25 years or more—is Interlux Schooner Varnish or Pettit Captain's Varnish. These varnishes have an amber hue that brings out the wood's character and gives the gloss more depth, but isn't actually changing the color of the wood much. The main purpose of varnish is to provide UV protection for the epoxy beneath. With 3-5 coats of marine varnish, you'll get several years (at least) between refinishing, especially if you store your boat or camper out of the weather. Varnish on a lightly used vessel might last as much as a decade!
How do I know when it's time to refresh the varnish? Not to be glib, but: When the finish starts looking scruffy enough to bother you, sand lightly and varnish again. That's all there is to it. The varnish has to be peeling off in sheets before it stops doing its primary job: Protecting the epoxy from UV light. Likewise, a good marine grade paint will require little maintenance. Even if the paint gets pretty scratched up, it's still doing its job of protecting the epoxy from sunlight. Here's an in-depth look at maintaining finishes.
How to Apply Marine Varnish
Here's the Digest Version, for the impatient types:
• Sand the epoxy coating, taking out all of the lumps in the epoxy, and "feather in" overlaps of fiberglass cloth.
• Work your way up through the grits to 220-grit sandpaper before varnishing.
• Sterilize the surface with solvent and a clean rag.
• Apply thin coats of varnish. CLC's kayaks and smallcraft need a minimum of 3 coats and a maximum of 5.
• Between the first few coats, roughen the surface with a clean Scotchbrite pad to give subsequent coats some "tooth" to stick to.
• Wet-sand with 400-grit before the last coat of varnish.
Part One: "Prepare Surface."
(The most fraught two-word phrase in the mother tongue.)
The old joke around boatshops is that "boatbuilding is 95% sanding." It can feel that way. Ultimately, your patience in sanding will determine the quality of your finish. Along with a proper dust mask, we recommend noise-cancelling headphones and really good audiobooks.
Epoxy is a miracle material, but as a liquid coating it doesn't do a great job of leveling itself. The cured epoxy surface tends to be mottled and bumpy even in perfect coating scenarios. Most surfaces of the boats in CLC's catalog have three coats of epoxy on them, with or without fiberglass.
Read a good article on applying epoxy and fiberglass, and another on how to sand it.

In this photo, 120-grit sandpaper and a 5-inch random orbital sander is used to level the epoxy on a kayak. You know you've got it right when the surface has a uniform cloudy gray-white texture. If you have little dark glossy pits, you need either to sand more, or to apply more epoxy to "fill the weave" of the fiberglass fabric.

It’s very important to keep your sanding pad FLAT. It's tempting to lift the sander up on edge, but not only is this slower, you'll cut shallow arcs in the surface you're trying to flatten.

Note the dark stripe of unsanded epoxy along the seam at waist-height in the photo. Dillon has kept the sander away from the corner (or "chine") where two panels meet, as it will cut right through the fiberglass. Corners are sanded by hand! (It's the same story whether you're varnishing a boat or a Teardrop Camper.)

220-grit on a hand-sanding block is ideal for smoothing corners, and any other crevices you can't reach with the power sander

A look at smoothing the epoxy coating on a Cocktail Class Racer. Unsanded epoxy LOOKS kind of like lumpy varnish.

It may seem strange that, in the process of prepping your project for varnish, you use a sander to turn the quasi-glossy epoxy-coated surface of your project a cloudy white again. But this is EXACTLY what you must do to bring up a smooth and deep gloss when you apply varnish.
The epoxy surface turns cloudy because the sandpaper scratches the surface. These surface scratches prevent light from illuminating the epoxy-coated wood. Coating the sanded surface with varnish (or another coat of epoxy) fills the scratches, and boom! the light can reach the wood, bounce back to your retinas, and it's glossy and beautiful again.
I mention this to empasize why you should work your way up through finer and finer grits of sandpaper. Nothing's stopping you from varnishing a surface smoothed to 120-grit, or heck, even 80-grit. Coated in varnish, the rough-sanded surface will have SOME gloss, but it's beyond the powers of varnish to fill the deep scratches. The result is a hazy, cloudy finish with none of the deep gloss you'd like to achieve.
An epoxy surface smoothed thoroughly with 220-grit is usually ready for varnish. The scratches left by 220-grit paper are shallow enough to be filled with varnish and allow light to illuminate the wood grain unobstructed. Patient finishers can go one step further at this point and wet-sand the epoxy surface with 400-grit paper. But having reached a 220-grit surface, your skill as a varnish applicator will probably have more to do with the quality of the finish at this stage.
What if you cut through the epoxy and/or fiberglass to the wood while sanding? It happens to everyone, including us. Really serious "burn-throughs," for example along a seam, might warrant a patch of fiberglass. Otherwise, burn-throughs may be fixed by brushing epoxy over the spot, letting it cure, and sanding again...this time more carefully.
Here's what happens if the "burn-throughs" are especially bad and not dealt with.

When you're done sanding, you need to clean the surface of the boat. Really STERILIZE it. Modern marine varnishes are pretty easy to apply, but they won't stick to just anything. Use either generic denatured alcohol, or the solvent recommended on the varnish can.
In any case, USE A CLEAN RAG, for pete's sake, and flip the rag often so that you aren't just "smearing the butter around on the bread," so to speak.
Common surface contaminates include exhaust from a car idling nearby in the garage, silicone flakes from the lubricant on overhead garage door tracks, or particles of fabric softener from the exhaust of a nearby clothes dryer. Also, rags that were used to clean the dipstick...don't ask us how we know.
Dust is the enemy of good finishes. Auto body shops have sterile rooms for applying finishes. We don't have that, and you probably don't either, so there will be some dust in the finish. We do the best we can to mitigate dust by vacuuming the shop, mopping the floor, and timing varnish application for the end of the day when the shop doors stop being opened and closed every three minutes.
If you have a concrete floor, creating a puddle of water on the floor around the project will keep you from kicking up dust as you move around. Make sure your shirt isn't dusty.

Part Two: Applying Varnish
First, let's talk about SPRAYING your varnish. If you are (1) experienced in operating an HVLP sprayer, and (2) you know how to mix the chemistry set of reducers and extenders to suit temperature and humidity, and (3) have a safe ventilated space in which to do your spraying: you should definitely spray your varnish! Our preferred Interlux Schooner Varnish and Pettit Captain's Varnish work great when sprayed. (As long as you're all-in on spraying, you might even consider two-part clear coats such as AwlGrip or Interlux Perfection Plus.)
Spraying paint and varnish is an artform, and if you can't put a checkmark by (1), (2), and (3), you will get better results—and more quickly—by "rolling and tipping." I spent a year practicing with an HVLP sprayer and never got to where my sprayed finishes looked better than those that I applied by hand. (For what it's worth, (2) & (3) were my biggest challenges.)
"Rolling and tipping" is what works for us. It's a quick and reliable way to create a glossy finish. We are often flattered by people who ask if our rolled-and-tipped finishes were sprayed.
Should I use thinners or reducers in the varnish? Assuming you're using the one-part marine-grade varnishes that we recommend, the answer is: Probably not, most of the time. You'll find that the current-generation marine varnishes and paints are really thin already. If your shop is hot, a dose of the thinner recommended on the can might help. It'll make the thin varnish even more watery, so it may take you five coats to get three coats' worth of gloss.

Roll with a thin (1/8") nap foam roller, and "tip" out the bubbles with a high-quality foam brush.
Above we have a close-up of rolling the first coat of varnish onto a CLC Teardrop Camper. First rule of marine-grade varnish: apply it in VERY thin coats. Your roller and your foam brush should feel almost dry! Apply too much at once and you'll get sags or "curtains" in your finish, every time.
Note the many tiny bubbles in the varnish in the wake of the foam roller. An even size and distribution of these bubbles indicates that you have applied a uniform thickness of varnish.
There's no going back to touch up a spot you missed, because marine varnish has a lot of solvent in it and "tacks up" within minutes. Returning with your brush to an area that has tacked up will result in a nasty brush stroke, which is even worse.
Roll just a small area, then "tip out" the bubbles with light strokes of a foam brush. To maintain a "wet edge"—the ability of the varnish to coalesce into a seamless coating without brush strokes—roll out smaller patches if it's warm, and larger patches if the temperature is cool. We don't recommend varnishing below 60 degrees F, or above 85 or 90.

"Tip out" the little bubbles with a quality foam brush.
There is a lot of technique wrapped up in this one photo. In sum:
Keep the foam brush very dry. If the brush sponges up too much varnish, you'll end up with brush strokes and too much varnish on the surface, which will sag.
Use light pressure, no more than is necessary to pop the bubbles left by the roller. Too much pressure will increase the likelihood of brush strokes or sags.
Brush strokes shall be in one direction only: from a dry surface to a wet surface. If you START a brush stroke in wet varnish, you'll leave a brush stroke at the spot where you set down the brush.
What about using traditional bristle brushes? If you've spent a lot of time getting used to your fancy badger-hair brushes, you may be apprehensive about switching to a lowly foam brush. Badger-hair brushes evolved to be the perfect applicators for older-generation coatings. But the traditional oil-based enamel marine paint and "spar varnish" are more viscous and forgiving of over-application. That's why we all use traditional bristle brushes to apply house and trim paints, which are thick and engineered to build thickness quickly without sagging.
It's really easy to get too much of today's glossy, durable Schooner or Captain's varnish loaded up in the bristles of a brush, leading to ugly things like runs and sags. Foam brushes are better for building up thin coats.
Yes, I'm uneasy about the environmental implications of single-use foam brushes. However, bristle brushes used to apply oil-based finishes require lots of solvent to clean—volatile solvents that will be discarded each time you clean the brush! That's worse.

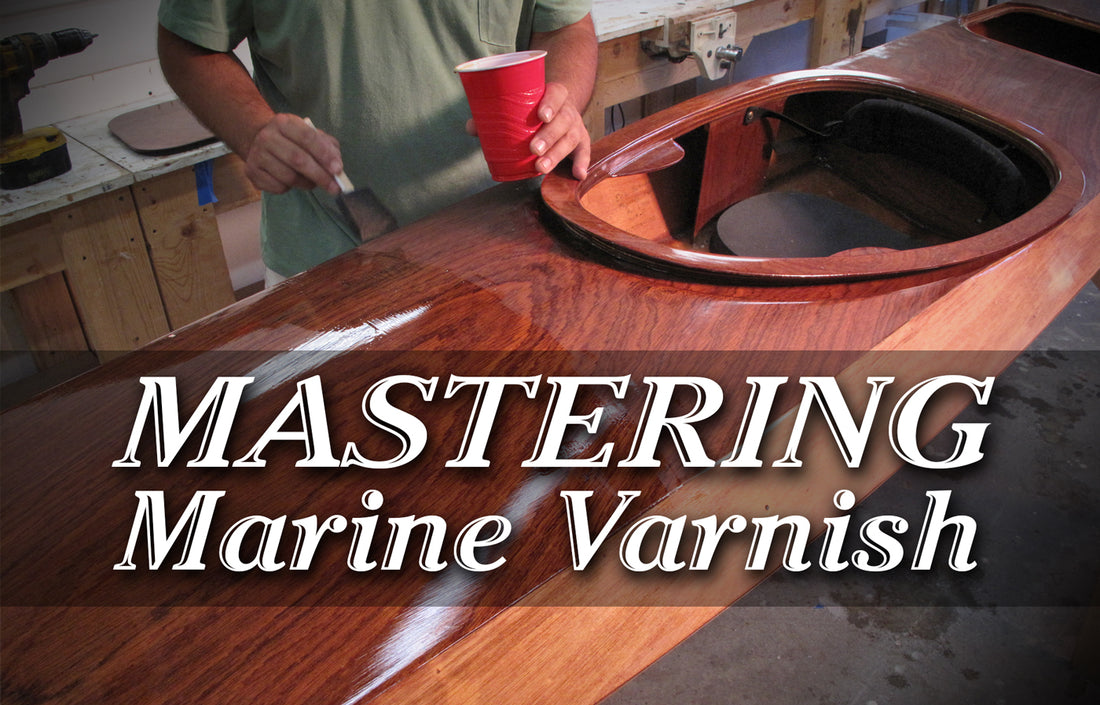
Tipping out the varnish on the deck of a Shearwater Sport kayak.
Note that the varnish is being dispensed from a disposable cup, NOT from the varnish can.
This is an important tip. Decant a small amount of varnish from the can into a cup, then seal the can tightly, right away! This prevents essential solvents from escaping the can while you're busy varnishing. These are the solvents that keep the varnish liquid until it's applied to a surface. The rate of loss of those solvents determines the shelf-life of your $40 can of varnish! So the more you can keep the can closed, the longer the varnish lasts. (A so-called "stop-loss" bag for the unused varnish will also extend shelf life vastly.)
Another reason to use a separate cup: surface contaminants that can cause fisheyes or other problems with adhesion aren't being transferred from the deck of the kayak back into the varnish can, where they'll continue to infect subsequent coatings.

A roller isn't always required. I use a foam brush alone for smaller varnish projects. The application technique is the same whether a roller is being used or not. Adopt a "cross-hatching" approach to help transfer an even film of varnish to the surface. (This is also a good way to avoid "holidays"—spots that lack any varnish.
Application strokes are applied across the woodgrain—vertically in the first sketch—followed by your "tipping" strokes following the wood grain. While tipping, it is crucial that the brush strokes go from dry to wet (right to left in the second sketch). The vertical strokes get the varnish onto the boat, and the horizontal strokes even out the varnish. This cross-hatch pattern also helps to eliminate "holidays," the term of art for spots on the surface that you missed with roller and brush.
Here's a short video clip demonstrating the cross-hatching approach on a Passagemaker Dinghy rudder and daggerboard. Varnish is applied in strokes across the grain, then tipped along the grain.
Another helpful trick is evident in the video: In order to coat both sides of the parts, thin brads have been driven into the wooden bench. For the purposes of building up a number of varnish coats, the tiny imperfections left in the finish by the brads do not signify. The parts might be suspended by strings for the final coat.

22 years ago I recorded a video that has a good demonstration of marine varnishing techniques, but there are a few things in there I wish I could get back.
One of them was the suggestion to wet-sand the varnish between each coat. That's overkill. Wet-sanding the varnish before the LAST COAT or two of varnish is ideal.
You want to build up at least two or three coats of varnish for the best gloss and UV protection. Energetic wet sanding will grind off a lot of the previous coat!
Instead, use a red Scotch-Brite pad to lightly scuff up the surface between the first few coats. Here in the US, red Scotch-Brite pads are equivalent to something like 320 to 400-grit sand paper. It's enough to get rid of kamikaze bugs and most of the dust, and will give the next coat of varnish some "tooth" to stick to.

Before you apply the next coat of varnish, clean the surface with denatured alcohol on a clean rag. A CLEAN rag, remember...
That's another detail in that varnishing video I regret now: the admonition to use lacquer thinner as a wipe-down between coats of varnish. There was a reason I did so: two decades ago, the older-generation epoxy systems still common in garage boatbuilding shops created surface contamination headaches, requiring strong solvents to dissolve.
Two decades later, surface contamination is rarer, thanks to the combination of better epoxy and a more informed amateur wood-epoxy boatbuilding population. Which is a good thing, because lacquer thinner is nasty stuff and can sometimes take a coat of varnish off like paint-stripper!

Wet-sanding before the last of your 3-5 coats of varnish is really helpful to get the smoothest possible finish.
Use 400-grit wet-sanding paper on a hand-sanding block. For those new to the finishing game, wet-sanding paper is waterproof, and you keep the surface of the boat wet with clean water while sanding. You can dip your sanding block in a bucket of water, or spritz the surface with a spray bottle as in the photo above.
Once you get to sandpaper finer than 220-grit, the dust you create while sanding will clog the paper almost at once. Thus the recommendation to 400-grit wet-sanding paper, because the water flushes the very fine sanding dust out of the paper.
On the lower left of the photo you can see the fine slurry left behind by the wet-sanding block. Wet-sanding is so fast and effective that the deck of this Shearwater kayak is sanded thoroughly in less than 15 or 20 minutes.

What about "satin" varnishes?
That's CLC's Tenderly Dinghy in the photo, a boat that looks lovely from any angle. One of the subtleties—unlikely to be noticed unless pointed out—is that the interior, save for the inwales, has been finished with satin varnish, otherwise known as "semi-gloss." The soft tone of satin varnish is perfect for a busy interior. Doesn't hurt that satin varnish can hide minor surface imperfections, whereas the standard gloss varnish will emphasize surface blemishes!
It's not as simple as swapping satin for gloss, however. The satin varnish (we like Interlux Goldspar Satin) lacks the strong UV inhibitors of Interlux Schooner or Pettit Captain's Varnish. Used on exterior surfaces by itself, on a boat that spends a lot of time outdoors, it will succumb to sunlight quickly.
The fix is easy! Just apply two or three coats of the glossy stuff first. Then two coats of the satin. That's all there is to it. It will have to be renewed from time to time, but atop the gloss varnish, the satin varnish lasts several seasons on a small boat like Tenderly.