
Builders' Forum |
|
| ↓ Scroll to Last Comment ↓ | Forum Guidelines | Builders' Forum | |
(I'm having trouble uploading my picture)
As I was getting ready to being taping the hull and deck "clamshells" together on my OxII shell, I looked inside with my flashlight and noticed that foredeck beam 2 had partially separated. About 1/4 of the ark came un-epoxied. Ugh.
I've already removed all the seams and tack-welded the two parts together, and I'm afraid if I try to undo all that work I'll break something and make things worse in my attempt to fix. And even if I do successfully get everything apart, I'm worried that I won't be able to fix the deckbeam becasue all my other epox work has cured/hardened and the pieces are MUCH less flexible now than they were when I put it all together.
So does this really matter? Any suggestions??
12 replies:
RE: So I discovered this today...
I am in the finishing stages of my OSII. My recomendation would be to backup and fix the support, now is the time once you glass them together it's too late. Cut the glue splot with a knife and re-wire (I actually assembled mine without wiring) if you need to. If you don't fix it you will always regret it. Sorry I know this is what you didn't want to hear but as an experienced woodworker I've learned to always fix your mistakes asap.
RE: So I discovered this today...
@ John Florance posted (I'm having trouble uploading my picture)
You're not alone in that, friend, not by any means....
Nor with finding out something's gone awry with your build that you probably ought to fix first before proceeding.
Much depends on what your idea of 'tack-weld' means compared to what some others of us have undertaken; epoxy (a little or a LOT?) or cyanoacrylate 'superglue'?
What kind of intervals (spots or lines?) / how far apart?
With epoxy you can use a heat gun - carefully - to soften the epoxy enough to either pull the tacked parts apart or instead work a box-cutter knife into the tack to separate the pieces. Then stick toothpicks or similar into the opened seam to prevent the two halves from coming back together as you work towards the next tacks.
With superglue there's a solvent made especially for dissolving it that might prove useful to undo those tacks.
(I'm curious too how far ahead of the cockpit is what you're calling frame #2? I downloaded the study plans - not being familiar with the OXII - but see only parts labeled as bulkheads and molds. You referring to part #38 - midship bulkhead - that's parted from the deck's underside?)
I agree with ews in his admonition to work out a means by which the fix can be done before you go any further. You'll be glad you did.
RE: So I discovered this today...
hi john,
before you do anything here, you need to determine if 1) your deck beam moved/broke out from the hull or if 2) the deck, when placed over the deck beam, never actually ended up making contact with all of the deck beam...and you are really just looking at a gap.
on tortured deck craft, its actually pretty common that a gap can develop between the deck and the deck beam or bulkhead. and if that is the case, i would not bother opening it up if it looks fine from the outside...there is another fix i can recommend.
if the deckbeam broke off the side, then i would take a different approch.
so if its just a gap, (situation 2) above, i would just put some peanut-butter thickened epoxy on the end of a stick and push it into the gap and then clean it up as best you can to minimize extra weight. by filling the gap, you will ensure that if weight is put on the deck, it is properly supported.
if the deck beam broke free, i would open it up (described by others above) and resecure it. it's a hassle, but you can consider it a learning opportunity :). i once found out, after carefully spot glueing a multi-chine hull, that i forgot to check for winding (twisted hull) and subsequently earned a PhD in the use of a heatgun to seperate glued parts to disassable it and get it right. it can be done....and its not that hard.
anyway, let us know if it condition 1 or 2...i am curious what actually happened.
h
RE: So I discovered this today...
in my in
I wish I could upload the photo...but I'll do my best to describe...
The OxII has a cambered deck fore and aft. On the foredeck there are two "beams" that partially cross the span of the boat at approximately 1' and then 6' abaft the bow. They are meant to give support to the 3mm ply deck, as well as to hold the designed camber. Neither beam connects physically to the sheer plank, but rather they are stitched and glued in place. You can imagine that if you have a length of 3mm ply and bend it on the fore/aft plane, there might be some tension/resistance to the bend. In the construction process, each beam is wired stitched to the deck, then CA glued and then filleted with wood-flour-thickened epox.
In my case, the 2nd beam back from the bow partially separated/pulled away from the deck ( about 1/4 of the length of the 10" beam, or 2.5"). Externally, I can't visually tell if the deck camber has been affected. It looks the same and appears to be symmetrical. It's possible that the camber may be being maintained by both the hull structure, and the remainder of the deck/sheer plank pieces that are held in place with epox and 'glass tape?
I'm loath to deconstruct because I fear breaking parts, and I worry that if I attempt to re-stitch/glue the beam that I won't be able to re-attach it because the entire interior deck structure has already been epoxy-ed and 'glass-taped.
Thoughts? Don't know if the link below will actually show tithe photo...?
JF
RE: So I discovered this today...
Yeah, the link works. All I can say is, "Yikes!" Wish I could offer some advice, but I'm sure others here will do more than wish.
.....Michael
RE: So I discovered this today...

1. Open the posted link to flickr
2. Click on the download button (lower right )
3. Hover over the desired image size (I used medium)
4. Right click and select "Copy link location" That puts the image URL onto the clipboard. In this case it was https://live.staticflickr.com/65535/49884476942_f3019453cb_c_d.jpg
5 Now that you've got the image URL, click on the image button in CLC's "Add A Reply" dialog box and paste the image URL into the appropriate spot.
As far as the boatbuilding aspect of this, I'm not familiar with the construction details of the OXII, so I've got nothing intelligent to add to what the other folks have said, other than you may want to call CLC and avail yourself of the tech support that's part of your kit.
Good luck,
Laszlo
RE: So I discovered this today...
excellent,
thanks for the picture. if the shape is fine i would not open it up.
i would use what i described above, situation 2, i would just push some peanut butter consistency woodflour mixed epoxy into the little gap that developed...and i would call it a day.
looks good:)
h
RE: So I discovered this today...
With the input from the picture there is no question in my mind you have to properly fix that before moving forward. Also you need to figure out why the fillet failed there must be a serious problem with the epoxy. If that failed you need to find out why and fix all other parts before sealing up forever. No fun but a must do. Sorry, Ernie
RE: So I discovered this today...
Your picture confirms your own observations and analysis. You wrote of these crossbeams: "They are meant to give support to the 3mm ply deck, as well as to hold the designed camber. Neither beam connects physically to the sheer plank, but rather they are stitched and glued in place." It appears that these beams are mostly intended to hold the camber and perhaps help the boat shed water from overwash in waves. If they are not structural support structures, you can take a more benign view of the flaw. Filling the gap with peanut butter epoxy as suggested above would stabilize the shape you currently have and lock things in place.
Alternatively, you might be able to rig up a temporary platform and post beneath the beam, "jack it up" into place, and secure it with epoxy wood putty. Be sure to leave the support post in place until the epoxy is fully cured. (Maybe a week in warm weather?)
RE: So I discovered this today...
just to chime in with birch...it's about maintaining camber....this is not a structural element.
so if you are satisfied with camber and it looks fine to you from the outside, i would not recommend any action further than what i already have.
the only point i would make, with respect to ernie's comment, is it is important to make sure that your epoxy is behaving as expected (hardening properly). and that you don't have a broader issue with the boat. i test my work by pressing my finger-nail into it after a couple days when it should be fully cured. if i can dent it (e.g., can't make it hard enough after plenty of cure time at the right temperature).....then you need to pause and sort it out.
fwiw....parts like this that are under a lot of tension often exhibit what you see here if you remove the stich or clamp before it is fully cured....which based on what i see looks like the case...parts under tension like this can also seperate if the surface preperation was poor or if there no fillet to get enough surface area for the epoxy relative to the stress. and i have experienced exactly what you see in your pictures when making hatch covers for kayaks that need to have curve held in the hatch where i simply got impatient and took the clamp off before i should have. usually for parts under a lot of tension, i wait 48 hours before removing my clamps and after confirming the residue is fully cured (see next paragraph).
one of the things i do as a matter of practice, to ensure i know what is happening with my epoxy, is i do not throw away my mixing container for any batch i applied to a boat. i keep it to confirm the epoxy residue left in the cup is hardening as expected....and then throw it away.
but basically, if you test the rest of the boat and your epoxy is hard (fingernail test) you are fine.
h
RE: So I discovered this today...
Thanks hspira! I think you have the right of it. I snipped the stitch before it had a chance to fully cure. Tech support doesn't think it's a problem. I took a straight edge to see if the camber was affected. I doesn't look like it. Not the best photo, but you can see that the distance from the deck sheer to the straight edge is pretty close on both sides...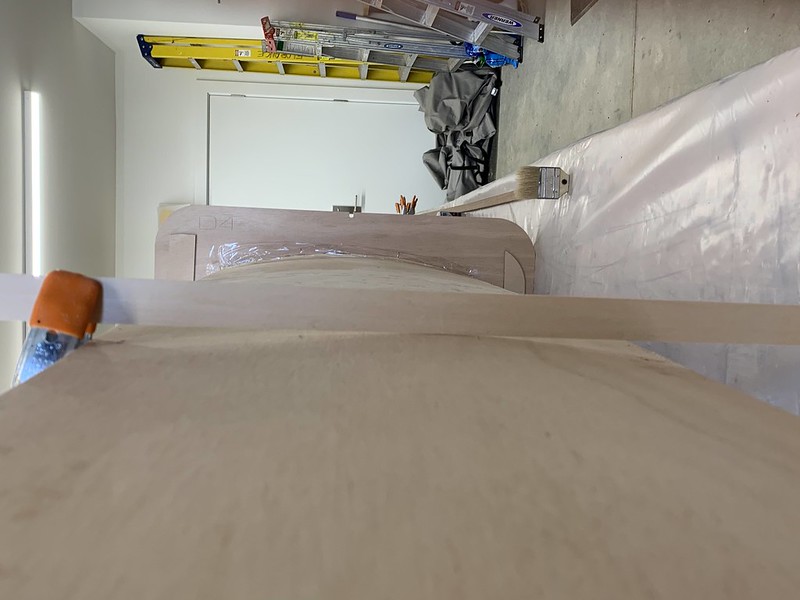 Thanks for all the advice and well wishes, guys!


RE: So I discovered this today...
» Submitted by John Florance - Mon, 5/11/20 » 4:42 PM