
Builders' Forum |
|
| ↓ Scroll to Last Comment ↓ | Forum Guidelines | Builders' Forum | |
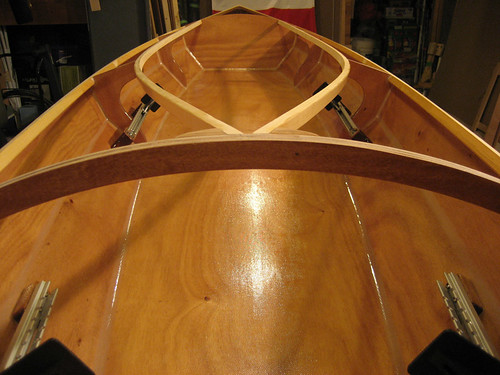
I don’t want to ‘hog’ this excellent site, but I have found it a source of plenty of information and advice. Thinking about the task of making epoxy-and-filler fillet joints, I wonder if there are alternatives. In my half-completed Ches 17LT I am far from satisfied with the neatness of these internal joints, and being a fussy feller am chafing at my incompetence! It simply seems to be so difficult to get a good, smooth, rounded fillet that looks neat, especially around the bulkheads. The simple question therefore is – can any of the commonly available high-strength construction adhesives be used for such a purpose? I refer to the ones that are designed to be used with timber, that come in tubes of about 320 gram weight, with a plastic nozzle, and that are used in a cartridge gun. The fillet joint will eventually be covered with fibreglass tape and epoxy resin on both sides, of course, adding to the strength and durability of the joint. I should say that I have read in specialised wooden boating magazines of this use for products like these, but your specific product names are probably different to our Down Here. One advantage for small amateur constructors like me may be that the product is low cost, but chiefly I am sure that with the cartridge gun application an excellent and neat fillet could be obtained, even right up into the deep-vee ends of the craft, which is very difficult to do using the hand-applied epoxy fillet method, which cannot be made with a gun. I should add that I have a couple of test pieces curing right now, one with a shallow angle (typical hull bottom) and the other a deep vee. I will see how they go, and of it looks promising will then go to the next step of adding a glass cloth and epoxy skin to both sides of a test joint or two. I look forward to words of wisdom from the usual suspects – with thanks and best regards to all…
Lol from Oz
32 replies:
RE: FILLETS...
I don't think I would try the construction adhesive. That stuff never really hardens - stays kind of rubbery - maybe someone with a chemistry background can speak to it reacting negatively with the epoxy? Once you find a good fillet recipe you'll find they flow smooth. For me, the trick was eliminating wood flour altogether. I found it was the ingredient that made the fillets lumpy and hard to pull. After some experimentation (West System) I found a mix of colloidal silica, microfibers, some Microlight and a touch of microballoon (for colour) made for a good strong fillet with good colour properties. I especially wanted this for my MC16.5 with its wide-open cockpit. The fillets blended in nicely with the wood once the glass was down. I did spend the time and used masking tape. Added a few hours to the job but not much else to do during Cdn. winters. Chris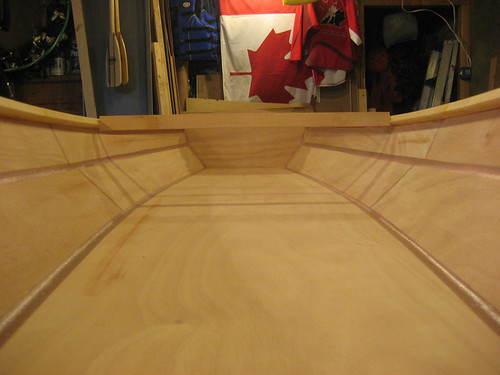
RE: FILLETS...
Some painters tape and making the fillets in a sandwich bag and cut away one small corner of the sandwich bag to lay out the fillet works great.
The first recipe takes a little time but then you get a feel for just the right consistency so it is not too thick or too runny. I used the wood flour.
Try not to to do much at once. Small batches work best in the long run.
RE: FILLETS...
About the sandwich bag, use a reasonably strong bag, large-size ziploc bag hasn't failed me, and reinforce the corner that you will cut off with a small patch of clear packing tape.
If the joint is masked, running the fillet is very fast and foolproof. One run down the joint to lay the fillet down, and one (or two) pass(es) with a spreader to smooth is about all it takes. This can be done very quickly so the epoxy is out of the bag, and in the shape of a nice, thin, clean fillet in a matter of a few minutes. Pull the painters' tape off, lay down the glass tape, mix a batch of clear epoxy and paint the glass tape and entire inside of the hull and that is a good days work.
I can't imagine the total time for all of this, starting with pulling out the wires, (very satisfying :) masking, filleting, glass taping and epoxy coat is much more than about 4 hours? Probably less than that. And it will look pretty neat when it is finished.
I really like the color of those fillets Chris. Have to give that a try.
--
Ogata (eric)
RE: FILLETS...
Thanks for info, guys - any of you can come Down Here any time and make the next batch of fillets for me! I think that half the problem is the mix I am using - I believe the thickener to be some form of silica - it feels very 'gritty' when mixed up and it's hard to pull the smoother along the made fillet. Have to try some of the above recipes - problem is that some/ many of these items aren't readily available Down Here. I also like the bag trick - I think that might be the answer to a maiden's prayer and may give the same easy no-mess applications as the caulking gun approach I originally floated here. I may borrow my wife's piping-bags that she uses when putting decorative icing ('frosting', I believe to you) on her cakes and pastries. And Eric (Ogata) - pull the wires out BEFORE filleting???... or do I misunderstand?
Thank you all again - I shall persist! This is such a critical part of making the craft look 'just so' and impart that pride of ownership and of workmanship that we all seem to strive for (and some achieve!).
Lol from Oz
RE: FILLETS...
CLC now uses MAS Epoxies "Cell-o-Fill" instead of colloidal silica. It mixes up much smoother and easier than old silica stuff. Less of a health hazard too. It is pretty good stuff.
To take out the wires you have to have tacked the hull together the previous day. To do that, I mixed up some wood-flour epoxy, but on the runny (epoxyey?) side, put it in a large syringe and squirted it into the joints, avoiding the wires. This is also a pretty fast and simple thing to do. It holds the panels together so that the next day, you can remove the wires before filleting. Removing the wires makes it possible to run thinner, more uniform fillets. Oh yeah, after masking, before running the fillet, I also took some slightly runny wood-flour/epoxy in a syringe and hit the little wire holes to fill them up.
I looked at the timestamps on my photos, looks like this all actually took me about 5 hours. But I wasn't in any hurry and was probably goofing off too. This is still a kind of fun, satisfying part of building to me, that place close to where a pile of rough boards are starting to look like a boat. So if it took me 6 hours, I'd only be having that much more fun! :)
--
Ogata (eric)
RE: FILLETS...
Maybe I should clarify, CLC uses the Cell-o-Fill in place of the old Cab-o-sil (silica) for those tasks that would have required silica thickener. In class we used wood flour to make the fillets. I used wood flour to do the fillets on my Shearwater as well. That is what is by-the-book. But even when it is neat, wood flour does look a lot like poo:) Chris's custom fillets look much less poo-like!
Also, ziploc freezer bags, they have worked well for me.
--
Ogata (eric)
RE: FILLETS...
I used plain woodflour, too. It's pretty smooth on its own, but lightly brushing it with unthickened epoxy while it's still soft makes it glass smooth.
Eric, think peanut butter instead.
Laszlo
RE: FILLETS...
To Chris J, I don't think anyone could argue with your results on your MC 16.5, NICE JOB..... SEEYA Jack
RE: FILLETS...
Thanks Jack….Eric - I was relieved (no pun intended) that my fillets don’t look like poo!…I also forgot to mention that, like Eric, I pull the stitches to make filleting easier and to conserve epoxy. You can click here for a slide show of my MC16.5 build including steps of tabbing the outside seam to prepare for pulling the stitches…click on a picture for details…It takes a bit more time but pulling the stitches makes all the difference when seeking nice looking fillets. Also….Lol from Oz’s query about using a polyurethane construction adhesive like Liquid Nails® intrigued me. I’ve sent off a Tech query and I’ll post when I receive a response.
RE: FILLETS...
That's a real work of art Chris. Beauty.
And I don't know about peanut butter Lazlo, but perhaps chocolate? Yes, my fillets look like chocolate. At any rate, it's a good thing this forum doesn't support sound-effects. The possibilities for adolescent humor are just bottomless. And I like to think that while you can only be young for a little while, you can be immature forever.
--
Ogata (eric)
RE: FILLETS...
thanks, everyone - Chris J, I too have written off to two manufacturers of construction adhesive, one Liquid Nails as you note, the other is called Max Bond. There are numerous such products here, but I do not know if they are polyurethane or whatever...From experience using such products for handyman tasks around the house and garden (not on boats) I know that at least one sets rock-hard, like epoxy, while others do, as mentioned, retain a little elasticity (too much for boating use, I'd think). My two test pieces fall into the latter category after about 48 hours. I will also post the manufacturers' replies here.
Cheers..
Lol from Oz
RE: FILLETS...
Here’s the response I received from a tech guy at West System:
“Hello Chris: We have not specifically tested the method you are describing, but it may work fine. The concerns are ensuring that the polyurethane is fully cured since the epoxy will seal it from the moisture in the atmosphere making sure that the majority of the fiberglass fabric is contacting clean dry wood. The fiberglass fabric will carry most of the loads once it is fully cured, if the seam is not being taped, I would be concerned about the adhesive withstanding the stress from bending the panels.”The key will be to keep the fillets small (remove stitches) so that the tape has lots of wood to grab to. I have half a tube of Lepage PL Premium construction adhesive kicking around and some epoxy. I’ll do a test this weekend and post later.
Chris
RE: FILLETS...
Yes, but maybe not too small. We've been told on this forum that if you get fillets too small, the glass fibers will get over-stressed and the glass can fail. If you want more info you need to do a search on the Forum archives, to find out the facts.
Seems to me it was Laszlo who was our expert on this but I'm not sure. So you could also post a question here, but be aware that he's a recluse and it's very hard to get him to write.
RE: FILLETS...
More info from the manufacturer of one of the products that I thought could be used for filletting. Having just retired indoors exhausted after tediously sanding-down my abysmal fillets in 30 degree heat and 60% humidity (I barely have energy enough to type this!) I intend to buy a tube of this stuff and give it a trial. I will post results on this site later: the manufacturer here is Selleys, but I gather that Liquid Nails is available in the US.
~~~~~~~~~~~~~~~~~~~~~~~~~~~~~~~~~~~~~~~~~~~~~~~~~~~~~
Thank you for your enquiry.
Liquid Nails constructions adhesive would not be the best product to use here to to its flexibilty.
The product that several of us thought of for your problem is a product called "Liquid Nails Platinum". This is a brand new product on the market.
The benefits being, very rigid, very high adhesion strength (way better than the normal Liquid Nails), and very water resistant.
Attached is a pdf with some more info.
We recommend to test the suitability on some offcuts first to ensure it meets your needs.
~~~~~~~~~~~~~~~~~~~~~~~~~~~~~~~~~~~~~~~~~~~~~~~~~~~~~
Cheers from...Lol from Oz
RE: FILLETS...
On another note, Lol, just stick to the tape, sandwich bag and run a gloved finger along the fillet to smooth it out and you will achieve the best results with the least amount of effort.
Shortcuts most times, as you are considering with adhesive, lead to 'longcuts' and regret.
The fillets need to be large enough to offer the glass a rounded curve. The glass, as someone above mentions, offers no strength bending around sharp corners. All corners, inside the boat and outside need to be rounded off before glassing.
Another thing to keep in mind and equally important is that the fillet contains epoxy, some of which will soak into the wood and permanently bond with it. We are not just glueing the pieces together to hold them in place, there is chemistry going on with the epoxy bonding. The epoxy soaked fillet will also fully accept more epoxy later and permanently bond with the glass, which is what makes these boats so strong and tough when they are all finished. I would question adhesives ability as a fillet to absorb epoxy when laying out the glass later on. I think best to stick with the proven building methods and materials to guarantee success and ensure safety while out on the water. It is good to work on fresh ideas and try new things but you need to know and understand the chemistry behind the methods and products you will attempt to use.

RE: FILLETS...
Good advice Fishbuster. But I hope someone reports back on the experiment anyway, or finds out that its been tried. Would be interesting to know.
Interesting fact about there being a chemical reaction between the epoxy and the wood, never heard of that before. Everything I'd read previously says that it's just a case of epoxy penetrating the wood and then curing.
Makes sense, though. Maybe wood has some amine or amide groups or other that could act as bonding sites for epoxy groups, or something. I love to learn about this stuff.
(I'd love to be able to make a decent fillet, too, don't get me wrong. But we each have our limitations, and mine jump up as soon as I open the workshop door.)
RE: FILLETS...
Camper, I think you misunderstood part of my point....the chemical bond is not between the epoxy and the wood but new epoxy applied with glass to the cured epoxy of the fillets. We know that works, new epoxy bonds to cured epoxy, becoming one. In the wood, the epoxy soaks in, cures and forms a physical bond that will never be broken.
The question is whether epoxy will bond properly to cured liquid nails.
Some products won't even bond to the same exact product when cured and introduced to the same product that is not cured. A good example of this is RTV, the sealer people use around the bathtub joint. Once cured, applying more of many of these type products won't bond to the cured product, have to rip it all out and start over.
RE: FILLETS...
Fishbuster - the reason I sanded down the fillets is because they were crap! 'Scuse the language in this family-oriented site but there's no other word! I know that only I am aware of how they look, but it still hurts - especially when I see some of the inspirational results other guys like yourself have achieved. I think my ambition exceeds my skills level at this point - but I persist!
As for trying something new rather than sticking with the proven - well, if those who came before had not done so we would all still be paddling craft made of seal skin stretched over frames of driftwood and whale-bones, I believe!
I must say I am impressed with the amount of interest this subject of fillets has given rise to and I intend to make up some samples of various kinds of joints using the new product noted above, just to see how it performs. Stay tuned. Meantime, the use of a plastic bag or some similar hi-tech approach appeals in the eternal quest for the perfect fillet!
Despite much of what has been written, however, it does rather beg the question - what is the more important element in a joint, the 'bridging' fillet, or the fibreglass tape and resin applied over it?
Regards and thanks to all for your inputs...
Lol from Oz
RE: FILLETS...
Lol, I had same problem, fillets looked probably about like yours, and I spent some time trying to smooth them out with Dremel, sanding, scraping, etc. Still not great everywhere but I've moved on to the rest of the boat because I realized eventually that it's not that big of a deal.
Meanwhile, I learned a lot from my mistakes, and from this forum, and would do much better next time. Don't make the fillets too big, the plastic bag trick, masking tape, soak the tape before applying.
The nice thing about stitch and glue is that anytime you want to, you can go back and take a do-over.
RE: FILLETS...
Very late in my Pax project, I discovered "empty" caulk tubes (you can Google to find many sources). This makes for very fast, neat fillets. The empty cartridges run around $2.50 each - worth their weight in gold IMO. My next build, I'll use this exclusively for the fillets. You don't even need masking tape to do a neat job. Just a thin bead, and gently flatten it out with the fiberglass tape.
I began the cauk-tube technique when I got to the cockpit area. What a difference in appearance! Very little wasted material as well. Give it a try!
RE: FILLETS...
great advice, Megavolt. I have found an almost identical and near-perfect solution. I located, after much searching, some cheap ($2.50) Cake Icing and Decorating Sets in a local budget store that sells, among other things, cooking utensils, etc. They resemble plastic hypo syringes, have a bayonet-screw cap at the filling end, and the nozzles are screwed in the the dispensing end. They are about 4" in length and 1-1/2" diameter. Capacity is 150 ml, about half a cupful. Various types of nozzles are included ranging from very fine to quite flat and broad. I have tried this out with some filleting mix and, like you, found it very fast, neat, and above all leaving a smooth attractive-looking fillet. The answer to a maiden's prayer - and the cured epoxy that's left inside the walls of the syringe will crack-off so it can be re-used - but just to be on the safe side I bought four! And as a bonus I found that I was able to use the thing very smoothly, two fingers inside the little rings at the top, thumb pressing down on the cylinder - thereby indicating that I would make a fine medical doctor!
Wordsmith
RE: FILLETS...
I just finished filleting the skeg on my Skerry. I have run out of Cello-Fil so only had the wood flour. But since I chose to make the bottom more durable with an extra layer of fibreglas and a graphite-silica coating I decided to add a little graphite to my fillet mix to keep the color scheme right. Using the freezer bag trick (and an old spoon my wife doesn't know Ive appropriated) the fillets came out OK...rough compared to having had silica to add to the mixture but I was patient and waited the suggested 3 hours and smoothed them out nicely with some alcohol and a gloved finger. Very smooth! And I did tape the scribed lines I had layed out as I knew that once I started epoxying the skeg with that black goo on a black hull I was going to lose my reference marks. I ran a second row of tape right next to the first row and after I screwed down the skeg, wiped up the squeeze out, and waited an hour, I peeled the first line of tape off leaving a 1/2 inch space for the fillets next to the skeg. The spoon I chose perfectly smoothed out the fillet to the tape line and any excess was easy to scrape up off the tape and put back in the cup. There may be some minor sanding and of course the extra fine steel wool to match the texture of the bottom but it looks good and I may just paint the skeg the off-white color the 2nd and 3rd strakes will be when I get to that stage. If I ever learn how to add photos to this I'll show you how well the scuppered inwales came out and the laminated black walnut and Doug Fir breast hook laminates I glued up to overlay on the supplied breasthooks from CLC.Anyway I'm having a great time and look forward to flipping the boat and starting on the major fillet work, after I do a little more fine planeing and sanding on the undersides of the outwales. I may throw some epoxy on them too since gravity will be on my side!
DocChicago
RE: FILLETS...
When building my SW17 I followed steps for fillets and layed down glass and epoxied when fillet was still wet. When spreading epoxy I spread my fillets out. Can you wait and let fillet dry first so it stays in seams?
Phil
RE: FILLETS...
Phil - I had PRECISELY the same problem with the Ches 17LT. What were quite nice fillets along the hull bottom and side chines distorted and spread out in every direction as I laid the cloth on top and painted on the wet epoxy. Never again! From my hard-won experience with the Ches (and suggestions, ideas, and references from builders here) I intend to do the following on the next SW 17 build:
- tape edges where fillets are to be placed
- paint (using roller) inside taped area with epoxy thinned with 10% diluent (TPRDA) ensuring inside wired-together cut edges of ply panels are coated to promote absorption of epoxy from fillets
- tab fillets (some call it 'welding') between wires to hold hull shape
- remove wires after curing, then complete filleting with full-width fillets
- allow to harden, then lightly sand fillets
- apply tape and epoxy over fillets, pre-wetting tape with roller to minimise over-use of epoxy.
It sounds a little more time-consuming but by all accounts will enable me to produce near-perfect fillets, both visually satisfactory and structurally sound. I have trialled the use of my cake-icing syringes noted above, with excellent results, and possibly offering a bit more control than the other great idea, the icing bag trick!
Cheers..
Wordsmith
RE: FILLETS...
Wordsmith,
That's a good procedure, but you can save some time & trouble by not diluting the epoxy precoat and, rather than allowing the fillets to harden and sanding them, brushing them smooth with epoxy and let them just firm up a bit before applying the tape.
The key to avoiding Phil's & your problems with smearing is wetting out the tape before applying it over the fillet. Then you have only a light pressure on the firmed-up fillets, not enough to distort them.
This way you get to avoid the wait for a complete cure and the time & effort of sanding the fillets. It's also a better bond.
Have fun either way,
Laszlo
RE: FILLETS...
Thanks Wordsmith and Laszlo, next winter I will be building a Tandem so I will apply everthing I learned from my first boat and this forum, I just started varnishing, and can say building a boat is not as much fun as paddling, but I certainly enjoyed building her and look forward to next winters project. Now if we could have an early thaw:>) Over April break I'm planning on paddling in VA and visiting CLC. I'm wondering should I park a few blocks away? My wife says my boat looks good but I don't think I want to park to close to pro built boats.
Thanks again for the suggestions
Phil
RE: FILLETS...
I have been enjoying this discussion of the fillets process that I will be trying for the first time soon. I'm a urologist and think that a cather tipped syringe might be used as a "pastry bag" or "caulkgun" when applying a fillet. These are plastic 60cc syringes with tips like caulking guns that are disposable and available from medical supply companies. Do you think these may be useful?
RE: FILLETS...
Syringes are very useful in applying epoxy. CLC sells them, for those who don't have access to medical supply houses. They have the great advantage of not bursting, the way ziplocks & pastry bags can.
Their main disadvantage is cleaning them out again. I can usually use one 3, maybe 4 times, before it needs to get tossed.
Don't know what a cather tip is (and considering the body parts involved, maybe I don't want to), so I can't say how useful that would be :-)
Laszlo
RE: FILLETS...
Having started this popular - and to me at any rate informative - discussion I might have a final word. To Teoctom - your syringe idea will work fine - I have been experimenting for some time with my 'Cake Icing Set' 'syringe' (almost a toy version of your professional item -see post above) and it works just fine. I can produce quickly and easily near-perfect fillets. Just two points, if I may - firstly, your stated syringe capacity of only 60ml is quite small and you will quickly run out of epoxy (mine is 150cc and still needs refilling on any decent-size run of filleting). To avoid constant filling and re-filling may I suggest you get a helper and make up enough epoxy in one hit to allow the helper to re-fill the empty syringe while you make the joints with the other. This will save a lot of time and messing around! Second - push the syringe tip along, towards, and into the empty joint being filled rather than pulling it away with the epoxy behind the tip. In this way you will be forcing the epoxy into the gap between the two panels being joined, rather than allowing gravity to do its stuff, and the tip itself if cut to size and shape will give the sought-after rounded concave section. This can then be left as-is for a perfect fillet with no need to tool it or dress it up any more, which in my experience has always lead me to disaster - and the search for 'a better way'!
Enjoy and good luck with the build...
Wordsmith


RE: FILLETS...
» Submitted by dehager - Sun, 1/18/09 » 7:30 PM
There are no short cuts to good looking fillets. I actually enjoyed all of the scraping and sanding I have done to date, ok not all of it... but the extra time and steps spent applying the fillets will be quite evident when I apply the varnish.
Wood flour mixed with some Cell-O-Fill will give a rough fillet but works well if you are going to fillet and tape in one step as outlined in the CLC manuals. West System 410 Microlight will pull a smooth fillet and sands easy or you could also look into System 3 SilverTip EZ-Fillet but you are looking into additional cost.
Enjoy it, it is only one step in the process.