Volume 12, No. 2 Winter 2006
A great family boatbuilding project! Build it in a weekend from a kit, or build it from plans using local materials.
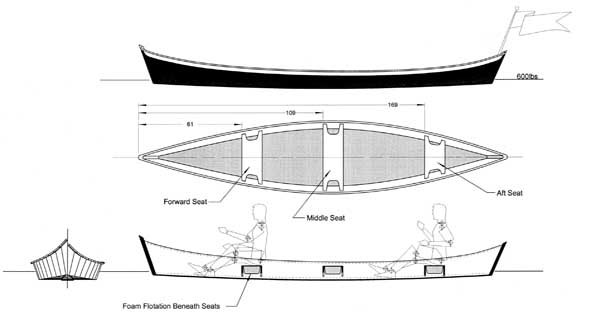
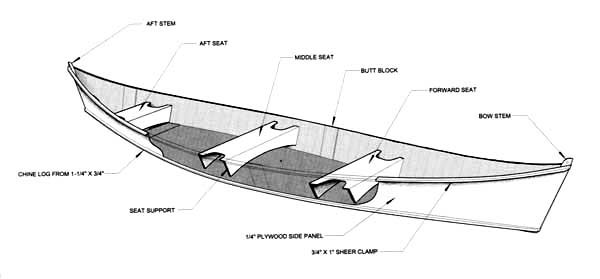
The Peace Canoe is an interesting new addition to the Chesapeake Light Craft fleet. Call it a canoe, a pirogue, a bateau, or whatever you like---the Peace Canoe is good basic transportation that you can build in a weekend. With its appealing shape, it won’t look like you built it in a weekend.
The Peace Canoe is aimed at first-time builders and those who don't want to commit to the 80 hours that our stitch-and-glue kits will consume. The quick build was made possible by eliminating epoxy resins and their long curing times, utilizing sturdy materials that do not require fiberglass, and engineering a construction process that is forgiving of imprecision.
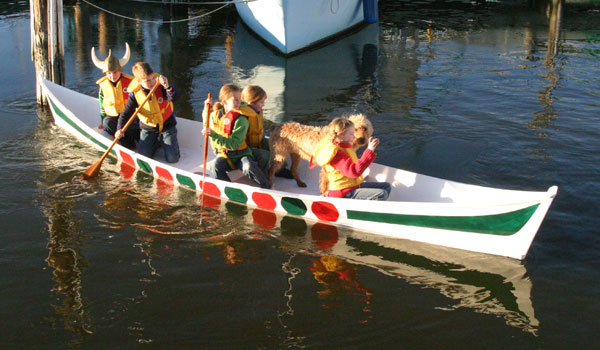
The kit has an interesting history. Designer John C. Harris created the Peace Canoe specifically for family boatbuilding events and corporate team-building exercises. "On the drawing board we called it the War Canoe," says Harris recalling the big canoes that he remembered from summer camp. “I definitely wanted to conjure up the whimsy and versatility of those old camp canoes."
 And he wanted the construction process to be fun too. "There is no mixing epoxy and no scary toxins," Harris adds. "And definitely no anxiety over dust and bubbles in your varnish - this is not that kind of project. It's designed to be fully hands-on for anyone who wants to join in, regardless of age. Definitely put the kids in charge of the paint job; they'll love it!"
With a one-day assembly time for the kit, the design has been a great fit for marathon boatbuilding events. At the Harvard Business School, faculty and staff built 15 of the boats as a teambuilding exercise. (Harvard had us change the name from “War Canoe” to “Harvard 18.”)
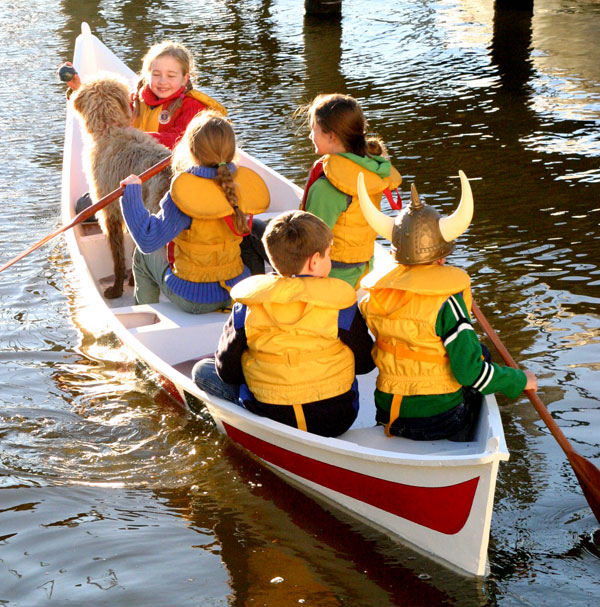
Noting the success of the Harvard project, WoodenBoat Magazine selected the design for its Family Boatbuilding event at the WoodenBoat Show in Newport, Rhode Island. “It’s the perfect design,” they said, “but could we call it “Peace Canoe” instead of “War Canoe”? And that’s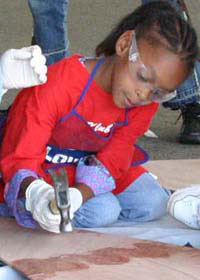 how the name came about. Through an essay contest, twelve families and groups were selected to build the canoes over two days. WoodenBoat Magazine later reported, "Watching their faces as they climbed into the vessels they created and paddled into the harbor was worth the price of admission and garnered time on three local TV broadcasts."
Like many people, Harris had often been disappointed with the results of one-day boatbuilding marathons. "The boats are either ugly or useless - frequently they're both. On the Peace Canoe I aimed for nice lines and some real utility." The boat's elegant shape fits right in with rest of CLC's attractive fleet. And with a payload of more than 600 pounds, it will easily absorb a family of five and a hearty picnic lunch.
The Peace Canoe has a detailed instruction manual to guide both kit- and plans-builders. The kit is comprised of computer-cut hull panels with puzzle joints to facilitate ultra-fast assembly. The hull is reinforced with traditional stems, sheer clamps, and chine logs, fastened together with polyurethane adhesives (as strong as epoxy but more forgiving!) and bronze ring nails. Plans builders can use AC fir or any strong exterior plywood.
CLC Shop Tip
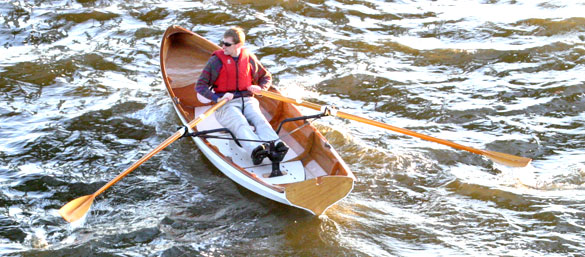
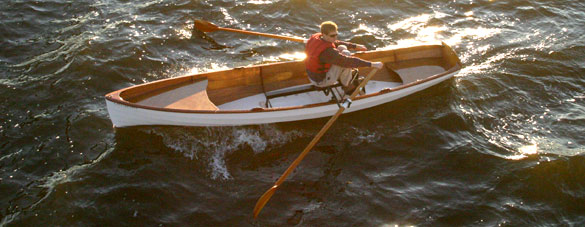
How to install a Piantedosi Row Wing in a Chester Yawl
We are often asked if a sliding seat unit can be installed in the Chester Yawl. The answer is "Yes!" and here's how to do it in a few simple steps.
Row Wing Assembly - You'll need the Piantedosi's leveling legs (L-shaped brackets) and a few other pieces of hardware. We've bundled these items into a Chester Yawl-specific Piantedosi hardware kit.
You'll need to slide the additional clamps (shown in the first photo below) onto the outrigger before attaching the outrigger support. Fasten the leveling legs to the monorail now. You can adjust their height by setting the rig in the boat.
 Step 1: Aligning the Piantedosi - Make sure the Yawl's floorboards are properly seated, set the row wing in the boat, and center it from side to side. (The footbraces point aft, of course.)
We'll align the unit relative to the center set of oarlocks. The outrigger sits just aft of the oarlock sockets. Use the bolts to center the rail clamp's holes over the oarlock sockets.
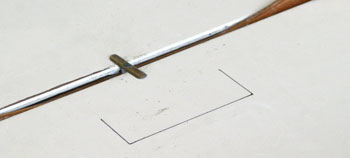 Step 2: Marking Leg Positions - With the row wing in position, trace around the leveling legs onto the floorboards.
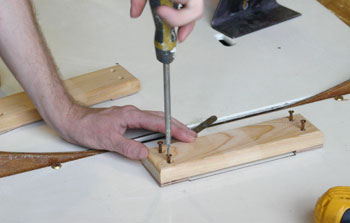
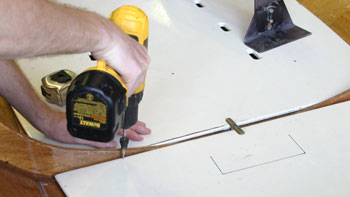 Step 3: Stabilizing the Floorboards - For sliding seat rowing, the forward and aft floorboards must be fixed in place semi-permanently. (The center floorboard is still removeable for bailing.) The floorboards are screwed to the floor ledges. The forward floorboard needs four screws; the aft floorboard only three. Here we are pre-drilling the holes with a countersink bit.
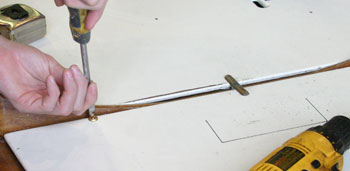
 Use the 8 x 1-1/4" silicon bronze wood screws and finish washers from your hardware kit.
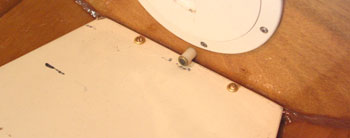
 Step 4: Installing the Blocks - The wood blocks included in your kit will stradle the bases of the leveling legs, as shown. Pre-drill with a countersink bit and screw the blocks to the floorboards. The leveling legs will slide under the blocks for easy installation and removal while transporting the boat.
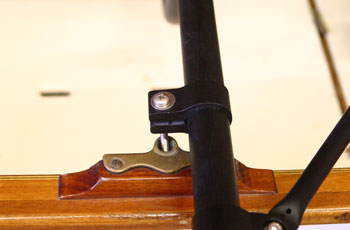
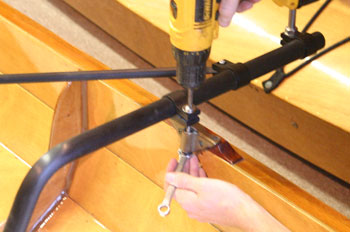 Step 5: Securing the Row Wing - Before moving the unit into position, put the bolts and washers through the clamps on either side. Turn the clamps so that the bolts are horizontal.
Now you can slide the row wing into place, turning the clamps down as you go so that the bolts feed into the oarlock sockets. Retighten the clamps, pop a washer and a locknut onto the other end of each bolt and you're all set. To remove the rig, simply reverse the process.
Chesapeake Light Craft carries Piantedosi Row Wings with Fit Kits for the Annapolis Wherry, Oxford Shell, Mill Creek 16.5 and the Chester Yawl.
New Products!
Toe Pilot Foot Control (Smart Track System)
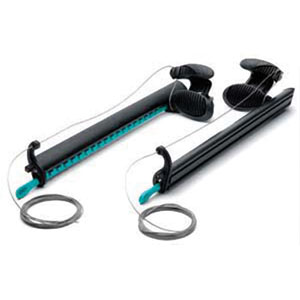 The "Smart Track" systems have returned after a production hiatus. This footbrace and rudder control assembly includes ergonomically designed, two-part foot pedals that offer significant advantages over anything else on the market. Unlike other systems, your feet don't slide back and forth to steer. The lower half of the pedals is locked in position so you remain in a solid brace at all the times. Steering is accomplished by minute pressure from your toes to the top half of the pedals. Even while seated, pedal position is easily adjusted for different users. Pedals cannot be accidentally dislodged and the track design prevents sand build-up.
|
VCP Watertight Hatches
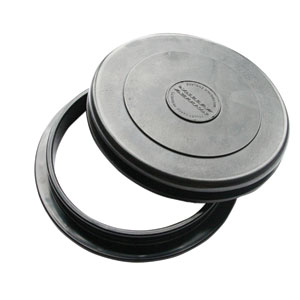 These are the hatches manufactured by Valley Canoe Products. A strong rubber hatch cover snaps over a plastic flange, creating a watertight - even airtight - seal. The design is said to have been adapted from WWII lifeboat storage compartment hatches.
Ideal for day hatches, or as an access hatches on wet boats. These VCP hatches are standard in Pax kayak kits and will work beautifully on Shearwater decks. (The plastic flange will not accommodate highly radiused decks.) Available in 7.5" round and 16" x 9" oval.
VCP Kayak Toggles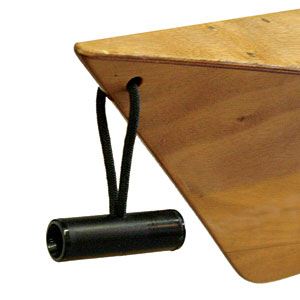
A simple and clean handle solution - we like them a lot here at the shop. Includes 2 feet of black cord.
|
Bow Ball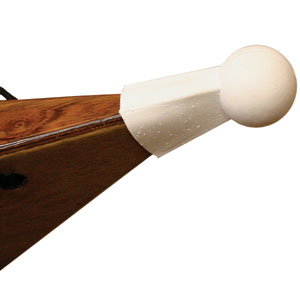
These special purpose rubber attachments protect the bow tips of rowing shells and kayaks, preventing boat damage and injuries on shore or in the surf. In many rowing shell events, you cannot participate in events without a bowball in place to protect bystanders.
Kalliste Foam-Core Carbon Fiber Paddle
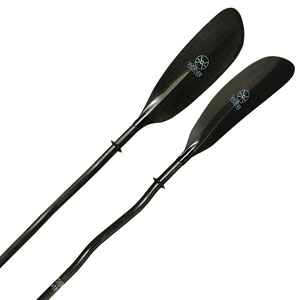 Quite simply, the Kalliste is the ultimate low angle touring paddle. By combining an advanced foam core design with a mid-size blade, Werner developed an amazing paddle with the perfect combination of gentle power and a smooth easy stroke. The bent shaft aligns your wrists for reduced fatigue.
This paddle is strong but bizarrely, eerily light in your hands - 26 ounces. If you're currently using a 36-ounce paddle, you're lifting an extra 10 ounces per stroke. At a medium stroke rate, that's an extra 1,685 pounds per hour! No wonder you're tired after you paddle. Make the leap to a paddle this light, and you'll never paddle anything heavy again.
Mistral Hybrid Paddle
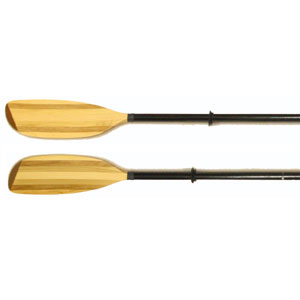 This paddle not only looks great with your wooden kayak, it's light on your wallet. Varnished wooden kayak paddle with composite fiberglass shaft. Seven lamination cedar, butternut and bass blade and low angle blade entry. Weight: 28 oz. Lengths: 210, 220, 230 & 240cm.
Sea Wing Kayak Carrier
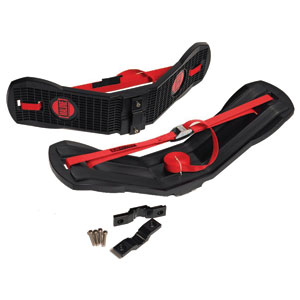
By Malone of Maine.
The SeaWing is a single boat mid-point mounting carrier that provides quick set-up for large beam kayaks while providing more rooftop space than any other traditional bottom-down system.
Features a universal mounting system, straps & stainless steel hardware, and reinforced heavy duty frame. Transports one kayak.
Deluxe Kayak Carrier
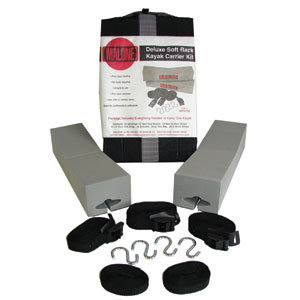
By Malone of Maine.
An excellent soft rack solution at a great price.
Featuring two 4" x 4" x 18" closed cell foam blocks, two bow and stern straps, one 15' over-bow strap, four "S" hooks, two 9' block straps, and a convenient carrying bag. Transports one kayak. This system is intended for light duty cartopping only.
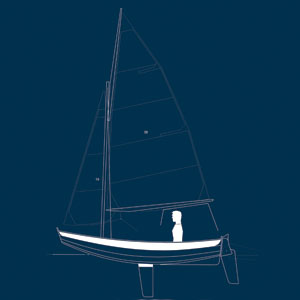
New T-shirts!
Perfect for the Passagemaker Dinghy builder, Skerry builder, or kayak builder in your family. These short sleeve tees feature detailed line drawings.
| | | | | | | |
| 3 new designs: Passagemaker Dinghy
Skerry Daysailer
CLC Kayaks
|  |  |  |
Don't Forget About our Holiday Sale!
 Winter Events at CLC
Build Your Own Annapolis Wherry:January 22-27
Canoecopia in Madison, WI: March 9-11
Paddlesport 2007 in Somerset, NJ: March 23-25
Build Your Own Chesapeake 17 LT: April 30 - May 5
Stay tuned as we'll be adding more events...

 return to section: