
Builders' Forum |
|
| ↓ Scroll to Last Comment ↓ | Forum Guidelines | Builders' Forum | |
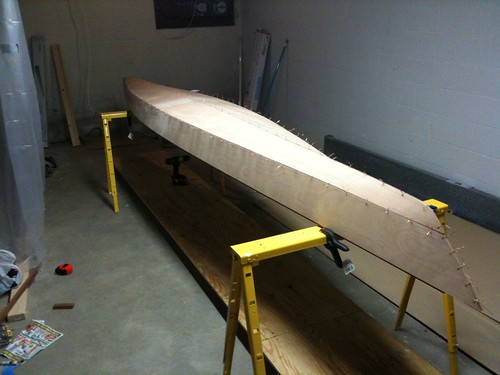
My dad and I got started on a Chesapeake 16LT this week. There are a few alignment issues that we have to sort out before we start gluing. Overall it's gone pretty smooth.
There are a few minor issues I have with the plans. For example the plans provide measurements for the beam, but it would be nice if measurements were provided for the spreader stick as well. Also, we ran out of wire about 1 foot shy of the stern during stitching. This happened while following recommended practices of cutting the wire bundles into thirds and stitching every 4 inches. Annoying to say the least.
I might get around to posting a photo or two later.
--jaydillyo
46 replies:
RE: Chesapeake 16LT Underway
Ran into another minor issue today. The Chesapeake video states that the fillet spreading tool has a 2" radius. I'm pretty sure that he meant to say 2" diameter. Every other reference to the size of the fillet tool says a 1" radius.
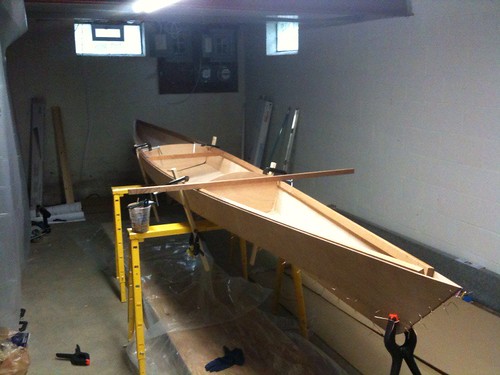
These are all minor things, but they can be quite confusing during your first build. I didn't get much done today. Just flipped the boat and put the bulkheads in place. Tomorrow I'm going to do the interior filleting and glassing.
-- jaydillyo
RE: Chesapeake 16LT Underway
Here are a couple of pictures. The second picture is where I'm currently at.
RE: Chesapeake 16LT Underway
Jay,
Looks awesome! I remember being there and being really excited that all those thin strips of plywood actually started looking like a boat.
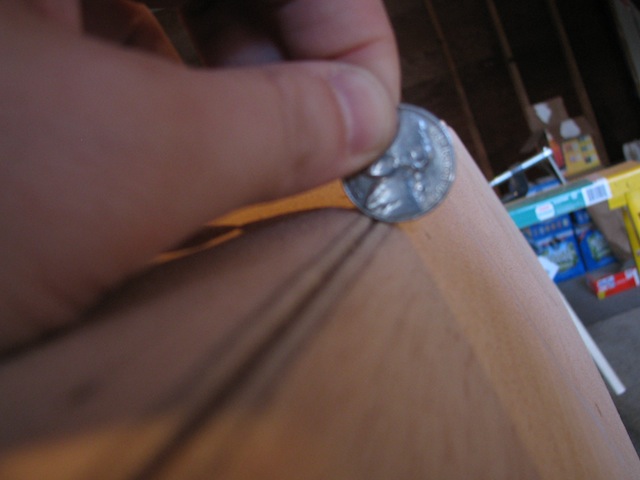
I wouldn't get hung up on the size of the fillets..., mine were a mess... so bumpy you couldn't lay glass over them and I had to sand (i.e., grind) them down and redo them. In the end you want as small a fillet as possible but big enough for the 4oz glass to lay over/into. If you can fit a nickle into it, you're good.
What I would recommend is that you do the "tack" first, putting smudges of epoxy in between all those wires. After 24 hours you'll have enough glue in the seams that you can remove the wires and then put complete fillets in all the seams. This alleviates the need to sand (again, grind) down all that copper wire after your epoxy has cured. Just easier. Also, mix your epoxy THICK!!! In one cup of epoxy (hardner & resin) I remember putting 12 tablespoons of woodflower to get it to the thickness I wanted. Learned this the hard way, after wasting a cup of "thickened" glue that ran through all the seams of my boat. Big mess, big waste of expenseive epoxy. The test I use is if it'll run off of my mixing spoon/stick, it's too runny. Thicker glue is easier to work with too.
Today I layed 4 more layers of 6oz glass over my original 2 layers of 4oz for my coaming. Much, much better today. The first run had so many bumps I had to cut several out - but the extra layers of glass made everything disappear under the heft of the glass. If I get gutsy I'll put the carbon on tomorrow... haven't quite decided.
I've got a running storyline with pictures on my post (Chese 17 (LT Modified), if you're interested.
Good luck, and keep posting.
Larry
RE: Chesapeake 16LT Underway
Jay,
I just realized, from your other posts, that you've built many of these boats. I feel foolish for offering what must seem like common knowledge advice to an otherwise experienced builder.
Still look forward to your build; hope I didn't insult your intellect with my builder's advice.
My 17LT is my first build; my next will be a Chese 14 for my wife.... Looking forward to that, too.
Larry
RE: Chesapeake 16LT Underway
You must be mixing me up with someone else. The 16LT is my first build. I also have the plans for the Shearwater 17 which will be my next build. That boat will be for me. In the spring I plan on building a small center console skiff. I have a lot of boat building ahead of me. Loving it so far. :)
-- jaydillyo
RE: Chesapeake 16LT Underway
Yes, you're right, I mixed you up with this post:
http://www.clcboats.com/forum/clcforum/thread/7374.html
Jayarbro and "Jaydillyo" looked awefully similar to me....
No worries, keep posting and enjoy the build,
Larry
RE: Chesapeake 16LT Underway
Just got done tracking the panels together so I can remove the copper wire. I think I went a little overboard because I ended up with little fillets in between the wires. I think it'll be okay as I'll be going over them with a larger radius fillet tool after they are cured. I didn't end up tacking the stern because I ran out of goop and didn't want to mix up another batch. Oh well, that's the way it goes.
-- jaydillyo
RE: Chesapeake 16LT Underway
My girlfriend and i did some work on the kayak today. We filleted and taped the seams in the bow and stern. It took a lot longer than i thought it would, but I guess that's ok. It seems to take a lot of brushing to get the epoxy to wet out the fiberglass tape.
We didn't do that neat of a job, but I'm okay with it since they are going to be hidden in the bow and stern compartments. Tomorrow we're going going to fillet and tape the cockpit compartment. I'm going to take the time to put down some masking tape around the seams for the fillets. I'm sure this will make a big difference.
-- jaydillyo
RE: Chesapeake 16LT Underway
Jay,
You might want to pass on taping the cockpit seams... IIRC the manual calls for 4oz glass in the cockpit, which will cover your fillets and give you the same strength factor as taping... it's also easier to lay your glass out without having an extra layer of tape to go over (leaves air pockets along the edge of the tape). Just a thought. My 4oz went into the cockpit very smoothly, and I ran it about 2" over the bulkheads to preclude having to tape those (they're taped on the opposite sides, in the cargo areas).
I know what you mean about "didn't do that neat of a job," you get epoxy everywhere (it seams) and it looks a mess against the lighter plywood. I painted my cockpit and cargo holds with exterior oil-based paint, covered up the color differences and gave it a much cleaner look, even though you can still see the glass tape outlines.
Sounds like things are going fast/well,
Larry
RE: Chesapeake 16LT Underway
Too late. I read your post last night right after we finished taping the seams in the cockpit. It's a good thing that I read your post though as we had completely forgotten to lay the fiberglass in the cockpit! We weren't very excited about having to go back and do more work, but we got it done and I think it turned out alright. I also ran the fiberglass up the bulkheads a little bit.
I did have some trouble with bubbles around the fillet tape. It took some patience, but I was able to get it to lay down pretty good, or at least make sure that there was enough epoxy to fill them. I ended up with one decent size bubble in the corner by my front bulkhead. That's the side that my girlfriend did! Don't tell her I said that though! :) I'm just going to inject some epoxy in there with a syringe and call it good.
I'll post a few pictures tonight.
-- jaydillyo
RE: Chesapeake 16LT Underway
Jay, sounds like a great job. I wouldn't sweat the little pockets along the seam tape and cockpit glass, the double-glass reinforcement of the seam is probably overkill! As to the bubble in the corner, just grind it out later with a sander and fill it with "goo" next time you have some thickened epoxy left over. Make a little corner fillet. I also found it useful to use excess epoxy to fill the corner gaps between the bulkheads and the sheer clamps - both sides - those hard-to-reach areas where you know you didn't completely cover the wood with glue/glass. Pushing a corner fillet into each of those gives you the peace of mind that when your boat goes over and fills with water, the clamps and bulkhead wood will stay completely dry/protected. Just an observation I made while building.
Always a little extra epoxy left over, and always somewhere you can use it!
Look forward to the pics,
Larry
RE: Chesapeake 16LT Underway
Here's a photo of the fillets in the cockpit.
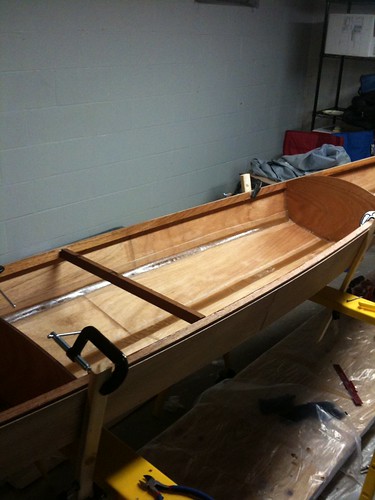
Here's a picture of the kayak as it sits. The cockpit is glassed and the entire interior had its second coat of epoxy applied. Not the greatest picture though.
-- jaydillyo
RE: Chesapeake 16LT Underway
Your glass work/seams look a lot neater than mine did! Maybe that's why I painted my interior...??? Hid a lot of epoxy / flour spills and clean-ups.
Excellent work, will be a nice looking boat!
Larry
Chesapeake Deck Installation Underway
I would like to attach the deck to the hull w/o the use of nails, screws, or copper wire. Has anyone every done some other method of attaching the deck to the hull. As a first time builder, the blog is great and has given me lots to think about.
RE: Chesapeake 16LT Underway
Hi Quickstart,
I'm sure somebody has attached the deck to a Chesapeake kayak without nails, but it would probably be a lot more difficult than using the nails. The deck pieces are pretty large and the nails keep everything from sliding out of position. The nails also do a really good job of clamping the deck while the epoxy is setting up. You would need a lot of cargo straps to be able to apply pressure so evenly.
There's also the issue of the unwanted dip that typically happens on the forward part of the Chesapeake deck. I did a test run attaching the deck to the hull with cargo straps and I was unable to apply enough pressure with the straps to remove the dip. However, when I did the actual installation, as I hammered in the nails, the dip popped out by itself and formed a nice, gentle curve like it's supposed to.
You also asked about sanding copper wire in a different post. It's pretty easy. First, trim the wire as close as possible to the wood, then you can use a sanding block or a random orbital sander to make it flush with the surface of the wood. I found the copper wire was a lot softer and easier to sand than I expected.
Hope this helps.
Mark
RE: Chesapeake 16LT Underway
Quickstart,
I had the exact experience Mark describes, I couldn't eliminate those dips (front and back). Magically (it seems), they disappeared as I nailed toward each end.
One option, albeit no less unsightly than nails, is to use screws, which you could remove later. But you're still stuck with ugly holes that need filling....
Good luck with whichever option you choose and let us know how it goes,
Larry
RE: Chesapeake 16LT Underway
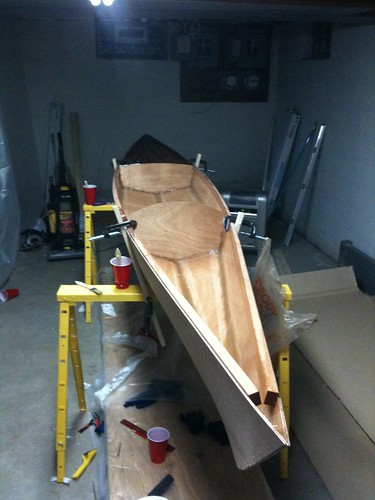
If you scroll up a few messages and look at the last picture I posted you'll notice that the bow has a tiny bit of twist in it. The bow isn't perfectly perpendicular as it should be. I'm pretty sure that this is because after I aligned it I used a spring clamp to help keep the bottom and side panels aligned how I wanted them so they would be nice and flush. I actually didn't notice this in person, I noticed it in the picture and when I went back to look at the kayak, sure enough, it is twisted a bit.
It isn't off by much, but I'm still wondering how this will affect tracking. Any idea how to mitigate any problems would be appreciated. I'm sorta stuck with it this way as it has been glued together for a while.
--jaydillyo
RE: Chesapeake 16LT Underway
YOu may be able to warm up the epoxy with a hair dryer and get it to soften enought to apply a counter twist. Then let it cool. I did that to a hatch cover that did not fit right. More difficult with a seam with fillets but with patience to let the heat penetrate you might beable to get it to work. Otherwise, figure out a way to force it into alighment and hold while adding the deck.. may be able to correct some of it. It doesn't look so bad in the picture so probably will not affect the performance.
Ed
RE: Chesapeake 16LT Underway
Thanks for the tips Ed. I'm hesitant to mess with the fillets by heating them. Is this detrimental to the fillets at all? I've already taped the seem and epoxied the inside. If it is unlikely to affect the performance I don't think I want to mess with it much.
-- jaydillyo
P.S. Where in NY are you located? I'm in Rochester.
RE: Chesapeake 16LT Underway
I'm just outside of NYC, in Westchester so not much help there. It is hard to tell how much twist is actually there verses the angle of the photo. The other option I can think of would be to actually run a saw blade down the center line of the bow cutting right through the fillet, glass, etc. Then fix the twist and epoxy it back together. Since you do an end pour later I do not think final strength would be a factor.
It seams like a lot to mess up what work you have already done. I guess it's balancing how much twist there is and how much that will bother you down the line against the extra work now. It is easier to fix now than later.
Perhaps some other builders can weigh in on this one.
Ed
RE: Chesapeake 16LT Underway
I'm ashamed to say that it's been a long time since I worked on the kayak, but I'm finally back at it. I moved it up into my garage for sanding. I didn't want to do the sanding indoors, even in my basement, so I was waiting for better weather.
I'm not quite sure if I have rounded the chines enough. It's hard to tell. I plan on glassing the bottom on Saturday as we have 70 degree weather in the forecast.
Here's a picture of what the chines look like right now. I'm not sure if I need to hit them a bit more or not... Might be hard to see in the picture.
-- jaydillyo
RE: Chesapeake 16LT Underway
Jay, they look good to me. My edges were rounded, but more like a 1/4" than the radius of a nickel. Just use patience when pulling your squeegee over the glass as you wet it out. Maintain firm contact with the boat as you transition from hull bottom to sides; that'll keep the cloth down hard on the wood (vice popping up over that seam).
Again, from what I can see you did a great job rounding over - very even along the entire edge.
Good luck,
Larry
RE: Chesapeake 16LT Underway
Today I sanded the whole thing in preparation of glassing the bottom. After I got done sanding I filled in the crack along the chine and the bottom.
The video didn't mention to do this until after sanding. A post on the forums mentioned to do it before sanding. I think it makes more sense to do it first, but I think mine will turn out ok regardless. I taped along the edges and filled the cracks, then I went over it with a squeegee.
Tomorrow I'm going to have to sand the chine and bottom again, but I'll use 220 grit just to be sure I don't take too much off.
-- jaydillyo
RE: Chesapeake 16LT Underway
Don't-cha just LOVE sanding??? I'm sanding the primer on the bottom of my hull..., that and the epoxy micro-balloon mix I used to fair in a few rough spots. It seems like I've sanded this hull about 6 times, and this weekend I'll put two more coats of primer on, which will also have to be sanded (almost completely off)! I just wish I were into the painting phase... already!
Yours looks good; keep posting,
Larry
RE: Chesapeake 16LT Underway
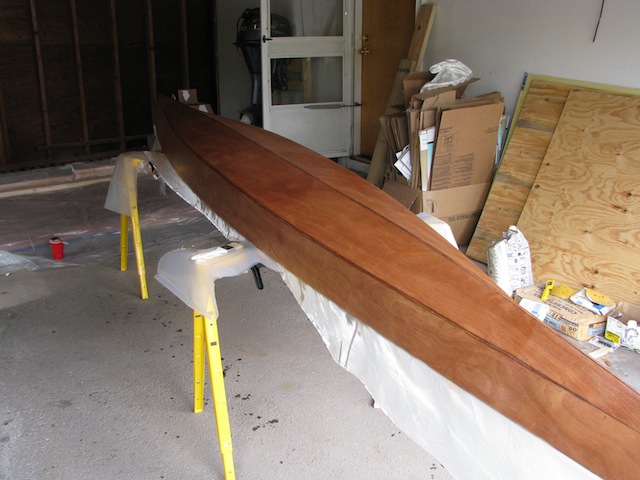
I managed to get the bottom fiberglassed today. It went pretty smooth.
-- jaydillyo
RE: Chesapeake 16LT Underway
Jay,
That looks excellent! And brings back soooo many memories! I even have those yellow, adjustable saw-horses..., how eerie to look at your photos!
Keep going, before long you'll be painting/varnishing!
Larry
RE: Chesapeake 16LT Underway
Today I trimmed off the fiberglass and rolled on the 2nd coat of epoxy. I'm rolling it on pretty thing so it's going to take several coats to get the weave to disappear.
My goal is to have this kayak ready for varnishing by May 20th. My parents are visiting and I want my dad to help out with the varnishing as this is a christmas gift from us to my mother.
-- jaydillyo
RE: Chesapeake 16LT Underway
Very generous! Gift to your mother.
I'm hoping to have my paint and varnish on about the same time..., the primer's on but I'm still unhappy with the front end... too many bumps/dips/wrinkles. Might put more epoxy fairing mix on it and resand (oh how I hate sanding these days!!!).
Be sure to continue posting pics; it looks excellent.
Larry
RE: Chesapeake 16LT Underway
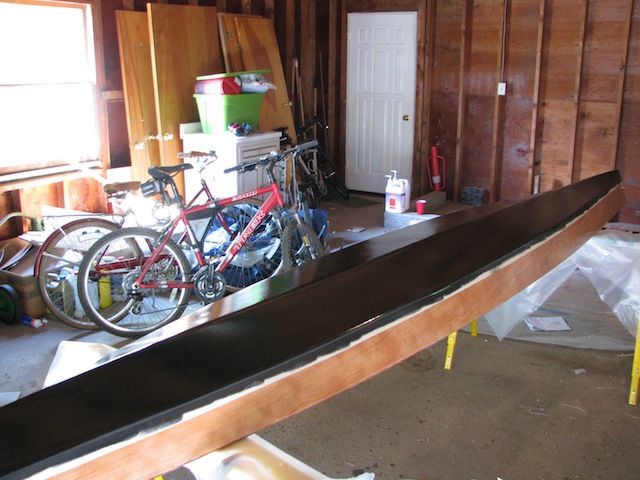
Finally some decent weather! The weather has not been cooperating with the kayak build at all. Today I put the first coat of graphite on the bottom. It's pretty ridiculous how the black shiny surface makes the flaws so prominent. I hopeful that after the 2nd coat and some sanding it will look better...at least that's the theory.
-- jaydillyo
RE: Chesapeake 16LT Underway
Wow! I hate planing! I'm only about 1/3 of the way done. It's taking way longer than I thought it would.
-- jaydillyo
RE: Chesapeake 16LT Underway
Sharpen your plane! :-)
Seriously, if you're talking about planing the sheer clamps, that should take well under an hour. If your plane is properly sharpened, it should glide through the wood and your problem should be how to slow it down. You might want to take a break and sharpen that blade.
Nice work so far.
Laszlo
RE: Chesapeake 16LT Underway
It seems sharp enough. I just wonder if I'm not taking enough off in each pass? I was a bit nervous so I didn't set it to take too much off at a time.
-- jaydillyo
RE: Chesapeake 16LT Underway
BTW, when I say it seems sharp enough I mean that it is brand new...
-- jaydillyo
RE: Chesapeake 16LT Underway
Jay,
Unless you plane is a Lie-Nielsen brand new doesn't mean it's sharp. The LN planes are the only ones I've ever used that didn't need to be tuned up a bit before use. Stanley, Anant and others are going to require putting the iron to a stone if you want good, sharp planes. Doesn't take that long and makes a world of difference in performance.
George K
RE: Chesapeake 16LT Underway
Thanks for the information. I have no idea how to do this though... I'll see if I can find a video online.
-- jaydillyo
RE: Chesapeake 16LT Underway
You can find sharpening instructions right here on this web site. Go to Shop Tips/Stich & Glue/Sharpening Tools. If you do not have a good eye like me, you can order a Veritas Mk.ii Honing Guide which holds the iron at the right angloe. I also had some instrctions from the net, but cannot find them at the moment. The recomended progressively finer grades of sand paper, ending with like 2000 layed on a sheet of glass. that works very well.
Get that dude sharp and you will be amazed at the difference.
Paul
RE: Chesapeake 16LT Underway
Alright. Well the deck is on. I had several screw ups along the way. First of all, I ended up doing it in 2 parts, so I couldn't overlap the halves to properly cut the pieces to butt right up next to each other. I cut them the best I could which left a small gap that I just filled with thickened epoxy. The second is that some of the nails I put in came through the sheer into the boat. I should have checked them sooner to make sure this wasn't happening. The mistake I made was that I angled the nails to be perpendicular with the deck instead of at the same angle as the sheer. So, now I have some nails sticking out into the cockpit. I'm just going to have to put a couple layers of epoxy over them so it is waterproofed and they aren't sharp. Live and learn right? -- jaydillyo
RE: Chesapeake 16LT Underway
You could cut the ends of the nails off with a dremel tool or gring them off with a sander before coating them with epoxy. That might give you a better finish on the inside of the sheer-clamp.
RE: Chesapeake 16LT Underway
You will be fiberglassing the deck soon, that will seal all the nail heads. After you have cut the hatches out of the deck, go on an extensive hunt for protruding nail points. Cut/grind them flush with the sheer clamps, then cover with unthinned epoxy. Any nails that you can't cut flush with the wood, use some thickened epoxy to cover. You don't want anyone's hands or feet getting cut and you don't want protruding nails or nail stubs to grab anything being stored in or retrieved from your hatches. Good luck.
RE: Chesapeake 16LT Underway
The kayak is loaded up on my Jeep ready to make the trip up North to the U.P. of Michigan. It isn't quite done yet so my dad and I will be finishing it there. Things left to do:
-- Finish epoxying the deck.
-- Combing
-- Hatches
-- Redo some of the graphite.
-- Paint the sheer lines.
-- Varnish.
That's still quite a bit to do, but I've got 3 weeks to get it done. I think I can do it.
-- jaydillyo
RE: Chesapeake 16LT Underway
The kayak still isn't done yet. I'm at my parent's house visiting hoping to finish it up, but disaster has struck. I put one coat of varnish on it last time I was here and left. My dad put on 3 more coats of varnish while I was gone. I had hoped to come back with the kayak ready to be outfitted, but that isn't the case.
Neither of us have ever varnished anything like this before. I'm using Z Spar Captain's varnish. I am not at all happy with the results. There were brush marks everywhere and honestly it looked pretty bad.
I wet sanded the top of the kayak until most of the brush marks were gone and put on another coat and it still looks like crap. It was at this point that I realized that the varnish is way thicker than it seemed it should be.
I did some more research and from what I can gather the varnish should be thinned out. Of course it doesn't say this anywhere on the can. CLC doesn't say this anywhere in the directions or in the video either. I was totally unaware that this should be done and now I'm stuck with a kayak that I'm not proud of.
I feel really let down, especially by Pettit. I'm not sure what I'm going to do at this point. This is definitely not how I wanted to finish this project up. It is a gift for my mother and I'm sure she'll still enjoy paddling it, but it isn't what I wanted to present to her.
-- jaydillyo
RE: Chesapeake 16LT Underway
Jay,
#1- Don't panick, it's just a boat.
Start by Sanding it smooth, no brush marks, no bumps- smooth, 180 grit should be ok. If you don't have a fairing board, you may want to make one. Gently sand between coats.
Varnish- I like Captain's varnish but a few precautions. ALWAYS pour the varnish into another container before applying. Do not put the left over varnish back in the can and never stick the brush[foam or bristle] into the can, ever. After opening, I use a skim sheet in the can. DO NOT SHAKE, gently stir with something clean. Foam brushes, new with each coat. If the varnish is lumpy, you can filter it through cheese-cloth. CLEAN_NO DUST, consider building a plastic tent and wetting the floor as you get to the finishing coats. Don't varnish in the sun, when it's really hot, never when it is rainning or when it's too cold. Always brush into the wet and don't play with it too much. You can thin the varnish if you want to but I think the varnish you are using is contaminated in some way. Buy another can and save the old for the lawn furniture.
Good luck,
Lew
RE: Chesapeake 16LT Underway
The can has never been dipped in. The floor has been wet for every coat. I really don't think the varnish is contaminated as I am not seeing stuff in it, I am seeing streaking. In any case I don't have the time to fix this problem as I am only at my parent's house for 3 more days. I am going to put one more coat on today and call it good. We'll launch it on Sunday and then unfortunately I have to go back home for work.
Maybe next summer I'll refinish it. We'll see.
-- jaydillyo
RE: Chesapeake 16LT Underway
So, I have to say that my "panicking" was for nothing. Any flaws that I could see in the garage under fluorescent lights aren't visible in outdoor lighting conditions. The kayak looks great.
I did end up sanding the top and putting on a thinned coat of varnish and it did improve the finish quite a bit. I do recommend thinning the Z Spar varnish. It goes on much easier and flows out much smoother. You can see my new thread for photos of the completed kayak.


RE: Chesapeake 16LT Underway
» Submitted by LarryMcInnis - Fri, 11/27/09 » 12:26 PM
Jay
I had the same quandry about the length of the center-section spreader stick, I think I got my dimensions from auto-cad. But if you take the beam, subtract 2 inches (for the plywood and sheer clamps), you'll be pretty good. I put a slight angle on mine to match the shear clamp angles and then drilled from the outside into the beam, then drove a small nail to hold everything in place. Was easy to remove later by cutting the beam in half, bending it off the nails and then pushing the nails back out. Left only a small (1/16th") hole.
I also ran out of wire, much earlier than 1 foot from the end (although I wasn't using a kit - just ordered my wire separately). I bought slightly thinner copper wire, which I had to strip the insulation from, and actually ran out of that, too. My last foot was held together with 1/8" zip ties. If I ever build another one I'm using zip ties all the way round. Much easier, and they don't break, like lots of my wire did.
Mine's a 17 LT (sort of - slightly larger) and it's been a fun project. I'm forming up a carbon fiber coaming now... not sure how well that's going.
Post pics as you go, would be great to see one take shape again.
Good luck, Larry