
Builders' Forum |
|
| ↓ Scroll to Last Comment ↓ | Forum Guidelines | Builders' Forum | |
Hi. I just ordered the Petrel Play SG. Excited and scared at same time.
I would like to ask some very basic questions as for what I need to get started.
Is there an advanatage of one clamp style over another type...Trigger vs Spring Clamps vs C-Clamps? What is a good recommened size of clamp opennings...2" or 3" or?????. I know the answer will be as many as possbile...but what is a estimate of how may clamps I will need.
Watching some videos I see some people using a solid bench and others using saw horses. Any prefference pros/cons.
Any suggestion as a newbie just wanting to get setup would help.
Thanks in advance.
8 replies:
RE: brand new beginner....
SPClark
Thanks for the information. this is the stuff as a beginner that will help make sure I have the correct tools.
RE: brand new beginner....
Glad I could offer some advice. If there were an edit button here I'd have added a caveat about clamping pressures with epoxy. Less is better!
Devising strategies that put the parts in proper alignment - getting things to fit rather than forcing them into place when they don't quite otherwise - is a worthwhile endeavor. Epoxy doesn't work like traditional wood glues, many of which require high pressures & thin glue lines to bond best.
Epoxy needs to stay in between the parts being bonded or there's less bond strength as a result. The thickener additives recommended - wood flour, cellulose powder, fumed silica (careful with this one particularly; you Do NOT want to breathe this stuff in!), phenolic micro-balloons, even powdered aluminum or graphite - all serve to add properties to the bonding mix to improve its performance in certain applications like filleting, scarfing, leveling out low spots, etc.
Keeping sufficient epoxy at the bonding site's rule #1 for success! Extreme clamping pressures aren't going to help achieve that as they can lead to a 'starved' joint.
Take time to review the tips & tricks videos here & elsewhere as you await delivery of your kit. There's a wealth of experience available about working with epoxy that I can only wish I'd had back 50 years ago when I built my first boat!
RE: brand new beginner....
Hello Saltirose, welcome to the club.
The Petrel Play is a wonderful boat. I love mine. My first suggestion is to add a skeg while you are building the boat. CLC has a kit designed by Nick or you can buy eslewhere. I retrofit one into mine after paddling it a couple of years.
I agree with spclarks comments on clamps. I ususally use a couple of spring clamps to get things in place then add the C clamps after.

The PP uses external forms so a flat surface to build on is needed. I built a table out of one piece of 8' ply with a couple of 2x4s for support.

One comment that you may not want to hear is that you selected a pretty hard S&G kit for a first build. There is a lot of bend and twist in the deck pieces so stitching it together is a challenge. The hatch recesses are particularly tough. Another difficult part is glassing the deck. Lots of contours with the recesses so it is easy to get bridging over the seams.

If it helps, here is the photo album of my build: https://flic.kr/s/aHsmyx6z7F
RE: brand new beginner....
SPClark and Mark N
Thanks again for info.
I know this is going to be a challenge...but I want a boat that fits my paddling and that is why I picked the Petrel Play SG. Wife will give me one boat so dont want to build something I will not like to paddle.
The fit up panels is going to hard part for me. I have made a couple of surfboards over the years so glass does not scare me. The fitting of access panels and cockpit are what look like I may be back here for info on. Hope instructio book is good. I have watch a few videos online
A 4x8 sheet of plywood will give me a 16ft long table. I was thinking about maybe 24" wide and 28-30" tall (im 5ft-6")
RE: brand new beginner....
With some previous class experience, you should be fine glassing the deck.
For the table, I cut the plywood in half lengthwise, then screwed the two halves together on top each other for a double thick 2'x8' table. I added two 2x4 on the bottom for support and just sit this on sawhorses when needed. You don't need a 16' long table unless you plan to use it later as a strongback for a strip build.
The trick to getting spousal approval for more than one boat is to build something for her. My bride thought that I was a fool when I started my first build. The boat came out great and after paddling it, she had to have one. Now she has two kayaks and a SUP that are hers.
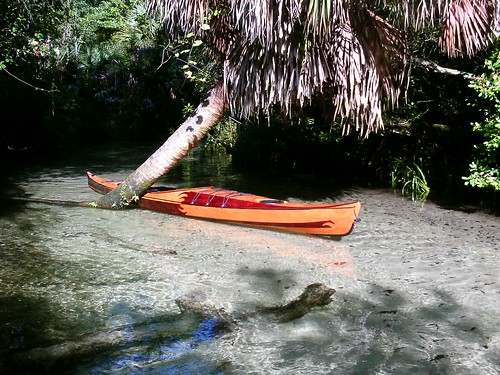
Picture of my PP following skeg retrofit.


RE: brand new beginner....
Mark N
So you do not need a full 16 ft table...8 ft is enough?
I like the color you have. Im thinking different pattern but would like to know what the reddish color is.
I paddled my Arluk II and Arluk III for years without using the rudder but just a few times. Do you really need the skeg to keep this boat tracking straight or just for wind
RE: brand new beginner....
I have used the 8' table to build 9 kayaks. The only negative is that i have to use the floor to glue the long panels together.

 I used Behlin Red stain on this boat. Behlin has been rebranded as Mohawk and CLC sells it. Using stain is a bit more advanced technique that requires extra care. Make sure that you read Nick's article regarding stain that is posted in the "tips for Boatbuilders" tab above. Make double sure that the stain you use is compatable with epoxy.
 The PP is a very manueverable kayak that tracks lightly. The average paddler will have no problem keeping it straight when paddling in light winds on flat water. As is normal with this much rocker, the boat will swap ends when you stop paddling. Just a little bit of skeg will keep the boat straight during low speed paddling, which makes it much easier to talk to your friends and take pictures. In waves, more skeg allows you to travel faster because you are using the paddle for power and not as much for steering.


RE: brand new beginner....
» Submitted by spclark - Sat, 8/7/21 » 7:46 AM
Welcome to the fold Saltirose!
My take on clamps and their relative utility put's C's in front, then the springers, followed by what you call trigger style. Then there's the pipe kind, which can also have value where longer distances are involved.
I rank them thus mostly by ease of use. C's can apply more force, are easily managed with one hand, but may be heavy and have shortish throats. Without attention to using pads of some kind (usualy scraps) they can dent soft woods. They're available in a range of sizes too, yet at the same time typically are pricey. Epoxy will stick to them.
Springers have lots of applications in stitch'n'glue. I have a number of 2" and 3", even a few 1" collected over the years. Oftentimes you can find them for sale used with a little searching about. 3's may need two hands unless not opened up much, the smaller I can manage. New most come with plastic pads on their tips that protect your projects. Epoxy doesn't stick to these pads so they're easily cleaned.
Pipe clamps - two to each 'clamp' with a length of 1/2" or 3/4" pipe in between - can be very handy at times too. When you have a couple you find all kinds of uses for them you'd maybe not considered before.
I'll leave it to others to comment on numbers of each for a PetrelPlay SG as I'm not first-hand familiar with that design.
When contemplating my Waterlust build I first thought sawhorses would be best but then changed to a temporary but solid platform. The flat surface afforded me more utility when dealing with aspects of construction where pieces were being worked with along their full lengths. Once the hull was stitched up I could raise it off the platform far enough (by means of a Harken Hoist I'd installed for future storage) for other parts of construction, using the flat platform as a bench.
One aspect of bench vs. sawhorses is the development of correct hull rocker during hull assembly. Most of these kits need hull support at two points along their length for this to be achieved. With a flat bench it's necessary to add blocking (I used short lengths of 2x4 lumber with a short length of 1x6 screwed crosswise onto each end for a combined height of 4-1/4") to achieve the proper hull curve along the bottom.
Hope this all helps you feel more comfortable with what you'll be undertaking! Don't hesitate to ask other questions, or confirm answers you find elsewhere, as you proceed.