
Builders' Forum |
|
| ↓ Scroll to Last Comment ↓ | Forum Guidelines | Builders' Forum | |
Shearwater Sport- When to cut the hatches
Been having a great time so far putting together the stitch and glue Shearwater Sport model. I previously did a Wood Duck Hybrid construction. In that plan you cut the hatch out after glassing the undersurface of the top. I can understand that as the glassing reinforced the strips and it worked well.
Which brings me to this stich and glue construction. The plans call for cutting out the hatches prior to glassing, leaving the top rather fragile since its just tack welded at the time of cutting the hatch openings and it leaves two areas of the top with rather skinny pieces of ply on either side of the hatch openings. It seems to me glassing the underside prior to cutting the hatches might be a good idea, but is there a reason I shouldn't do that?
The only reason I could see would be that the sill needs to be shaped to the angle of the top before gluing in place and would the glassing make this procedure less optimal, or is that something I should be able to work around?
3 replies:
RE: Shearwater Sport- When to cut the hatches
not sure why it times out...but just wanted to make sure you saw my post above
 final comment....the shearwaters are really fantastic boats....you will like it:)
RE: Shearwater Sport- When to cut the hatches
h
Thank you for the quick reponse and the great tips. I really like the idea of putting the boat "back together" between steps.
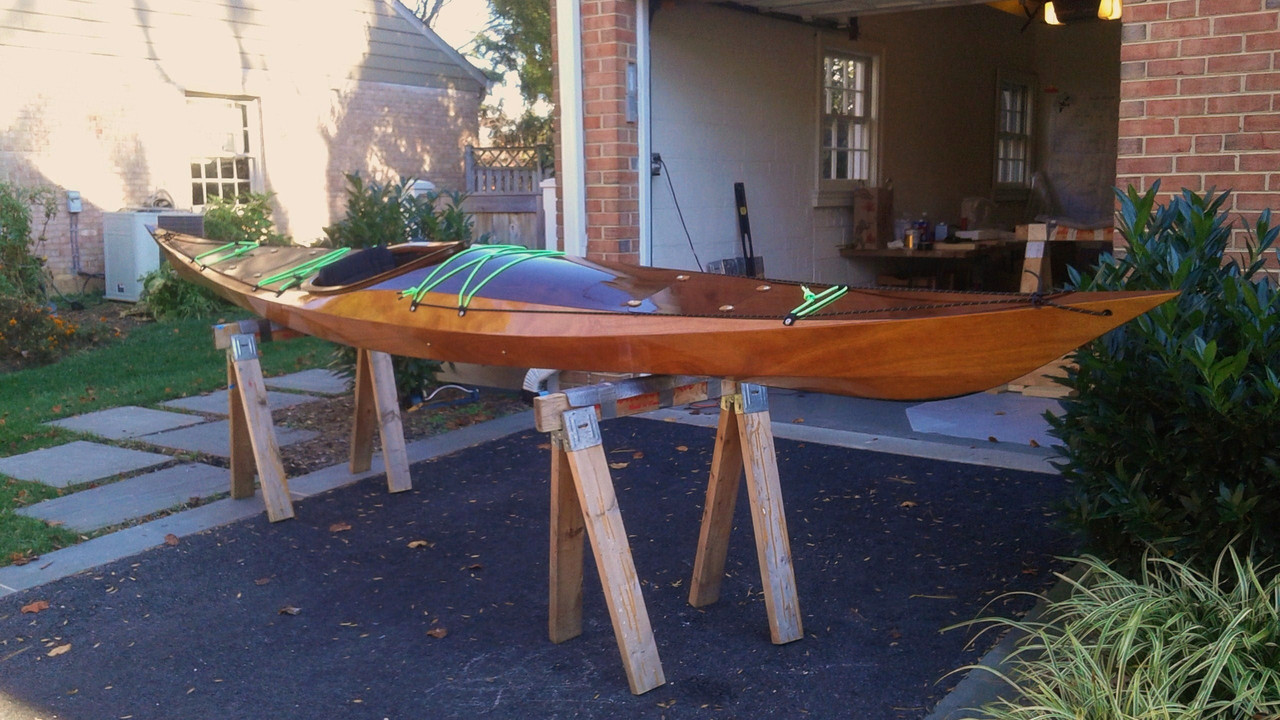
Great looking boat by the way!


RE: Shearwater Sport- When to cut the hatches
» Submitted by - Fri, 7/16/21 » 10:10 PM
Hi Macker,
Great question.
I have built a couple shearwaters and would offer the following:
First, the plywood is relatively strong compared to cedar strips….so I would not worry about if being fragile. while you still need to be careful handling the deck, you won’t break it if you treat it with reasonable care (e.g., don’t drop it and don’t bang it into anything).
Second I found that waiting to glass the whole thing, while different than a strip build, worked just fine and allowed the whole thing to be nice and easily integrated. While you could do it as you describe, I don’t think you gain much for the effort.
Too me the most important thing I did, was after I glued the hatch spacer and sill to the underside of the deck and after about 8 hours (when the epoxy was not sticky but not fully cured), I temporarily assembled the deck to the hull with strapping tape so that its shape was correct and let it sit for a couple day for the epoxy to really lock into shape. I Repeated that approach again after I glassed the underside of the deck, temporarily assembled the deck to the hull with strapping tape so that its shape was correct and let it sit for a couple day for the epoxy to fully cure. If I had to walk away from the project due to a holiday after that, I strapped the deck and hull together. I then did not have to struggle too much when I finally permanently mated the deck to the hull.
I find in any of the boats like a strip built or stitch and glue like the shearwater, you can get some pretty major drift in the shape of the hull/deck when you perform steps like hatches or glassing the underside of the deck or leaving it unassembled for a length of time…..so I have been careful to ensure I keep everything properly lined up prior to final assembly of any step where that drift in shape can be introduced. It’s a bit of extra work but pays off in the end in my experience.
Hope that helps,
h