
Builders' Forum |
|
| ↓ Scroll to Last Comment ↓ | Forum Guidelines | Builders' Forum | |
I'm planning on building a chesapeake 17 this winter. Can anyone suggest how to build a worktable. thabnks for getting back to me
15 replies:
RE: work bench
Wow, workbenches. I don't think folks are ignoring you, but workbenches is an endless subjuct frought with personal preferences and space limitations.
I work in my basment and built a workbench from 2x4s and decked it with 2x8s. For my shearwater, I did most of the panel work on the floor. the stiched up hull and deck sit on a couple of horses with plywood bulkheads topped with carpet. when I needed more space, like when the hull and the deck where seperate, I clamped two 2'x8' peices of 1/2" plywood together lenghtwise and set them on some workhorses.
Part of the process is stopping builing to prepare space, benches, horses, plastic, and tools for the next step.
Joel
RE: work bench
I used several arrangments. The layup table was in two sections approximately 9 ft long. The structure was a 2x4 frame with 3/8" plywood deck. The deck extended about an inch beyond the framing to allow for clamping. The two sections were bolted together in the center to provide a work surface approximately 2 ft wide x 18 ft long. The panels were supported by "short" job built saw hourses that were height built to provide a comfortable work surface.
If these photos work you can see the layup table. 
Standard plastic store bought saw horses were used to complete he hull, and attach the deck. I do not have pictures of the alignment chocks, and bracing for alignment. 
Then for operations after the deck was installed I used the sling horses. 
You also need a bench, table, old desk, etc to use as a mixing table so the epoxy, tools, etc are at a comfortable height near the work. This is all a personal thing. You don't need a strong back to build this boat. You just have to be careful to get things flat, square, plumb and true when called for. The more "secure" the work is the easier it will be to achieve the boat you want.
PS..... my layup table is now a ramp for the dog.
RE: work bench
note.........CLC has a video that shows the fC 17 construction and work tables/ horses.
RE: work bench
For the Cocktail Class Racer, we used a leftover 2x8 foot piece of 1/2-inch plywood, bought enough straight 2x4s to put a frame all around it, as well as three cross pieces, all put together with leftover drywall screws of various lengths.
It was laid out on a flat garage floor. When assembled, we lifted it onto a couple of small sawhorses, inserted a scrap 2x8 on-edge at each end to raise the height, and secured it all with some long screws. It's not rigid-stable, but it won't fall down or shift, it's stable enough to work on, and it only took an hour or two to put together. We covered it with plastic sheet to catch dirt and blobs of epoxy. We'll renew the plastic as needed.
Note that the CCR is actually assembled on a separate pair of sawhorses; the work table is to hold parts, supplies, and tools, lay out and assemble subassemblies, etc.
When the boat is finished, we'll probably disassemble the work table and salvage the wood and screws for other projects.
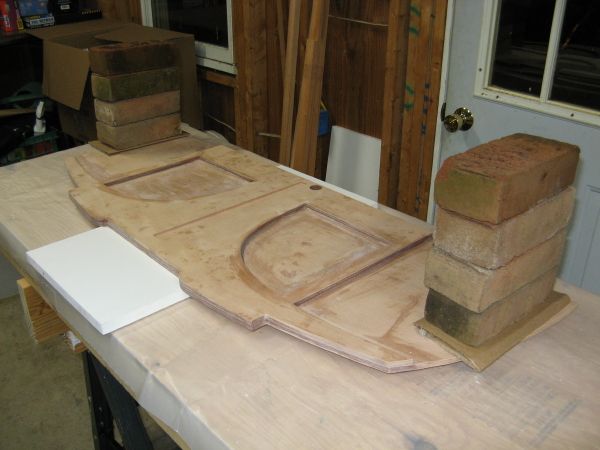
You can see the table below, being used for six weeks to straighten the slightly bowed transom, which is another subject altogether
RE: work bench
I built two workbenches for my 12' kayak. One is 8' and the other is 4'. Mine are heavy duty as when I am not building kayaks they sit at the sides of my garage. I have pictures of them on my blog at this LINK. Each only took about 4 hours to assemble as I was able to buy pre-cut 2' x 8' and 2' x 4' cabinet grade plywood. These are definitely permanent pieces.
RE: work bench
When I built my Skerry I got a piece of 1/2 plywood and split it into two 2'x8' pieces. I then bought some 8 ft 1x3's and screwed through the plywood into the edges of the 1x3's so there was a band of the 1x3's around each 2'x8' piece. This made them pretty stiff and flat. I used 4 folding saw horses to make two tables and used one for the boat assembly and the other for parts. Those plastic saw horses were just the right height. When the boat was assembled I made two saw horses of 2x4's and used cloth straps across the tops to cradle the boat for finishing.
RE: work bench
Thanks for all of the suggestions. I thought about using a 16 ft. x 24 inch table held up with saw horses to work on.
RE: work bench
This is an old thread, but just in case someone else is searching for ideas, I'll throw my two cents in.
When I built my Chesapeake Double, I made three 2-foot by 4-foot tables out of 1/2" plywood. I screwed a 2x4 to each side 3" from each long edge for longitudinal stiffness. I mounted them on folding saw horses. Make sure the 2x4s all line up so you can connect them together with 1x4s screwed into the 2x4s. I leveled them with wedges so the all lined up properly prior to connecting them.
The cool thing about these is that they store against a wall in the garage when not in use. If you're building a kayak up to 18 feet long, you can use two of them with a 2-foot extension bolted onto the 2x4s at one end.
Changes I would make: I would add cross bracing between the longitudinal 2x4s (use 2x4s or 2x3s for this in two or three places) to provide lateral stiffness (I got some sagging in the middle after a while; I'd use thicker plywood, but not much thicker or it'll get too heavy; The saw horses would rock back and forth when I was planing or cutting with a hand saw, so I'd find heavier horses or make folding stands with four legs.
RE: work bench
I got these horse from Lowes 74.00 for 2, free delivery.Totally awesome and saves a ton of time. has slots to make a table. I plan on putting uprights on 2 x 4's and make slings.
Height adjusts great
42-in Steel Adjustable Saw Horse (1,300-lb)
Item #: 786035 Model #: 85024
RE: work bench
Years ago I built a scow in a barn in South Carolina. I used an old ping pong table as a layout bench. Space was not a problem.
RE: work bench
You got me!
I have a beat up one in my furnace room from when the kids were young.
I could have used that!
I will use it as my lay up table.


RE: work bench
» Submitted by nemochad - Thu, 1/7/16 » 8:13 AM
For the ch's, I found a long and shallow "shelf" style bench to be very useful to build the parts, until the stitching stage where sling-sawhorses (with occasionally added cross bar tops) are needed.
I used 2- 1x12 pieces of melamine from the big box store, made 7 or 8 triangular shelf brackets (you can buy some of course), and secure the brackets to the wall carefully, so they were really straight and level. Then, mount the shelf an inch from the wall, so clamps can be slipped through the gap to grab the other side of various workpieces. By again being very careful to get the shelf's front edge straight, to use as a guide for the ch's hull bottom and side panel gluing.
The shelf is useful for gluing the panel scarfs, laying out long panels and full length battens to rout the panel to shape (plans builder), and then gluing on the clamps.