
Builders' Forum |
|
| ↓ Scroll to Last Comment ↓ | Forum Guidelines | Builders' Forum | |
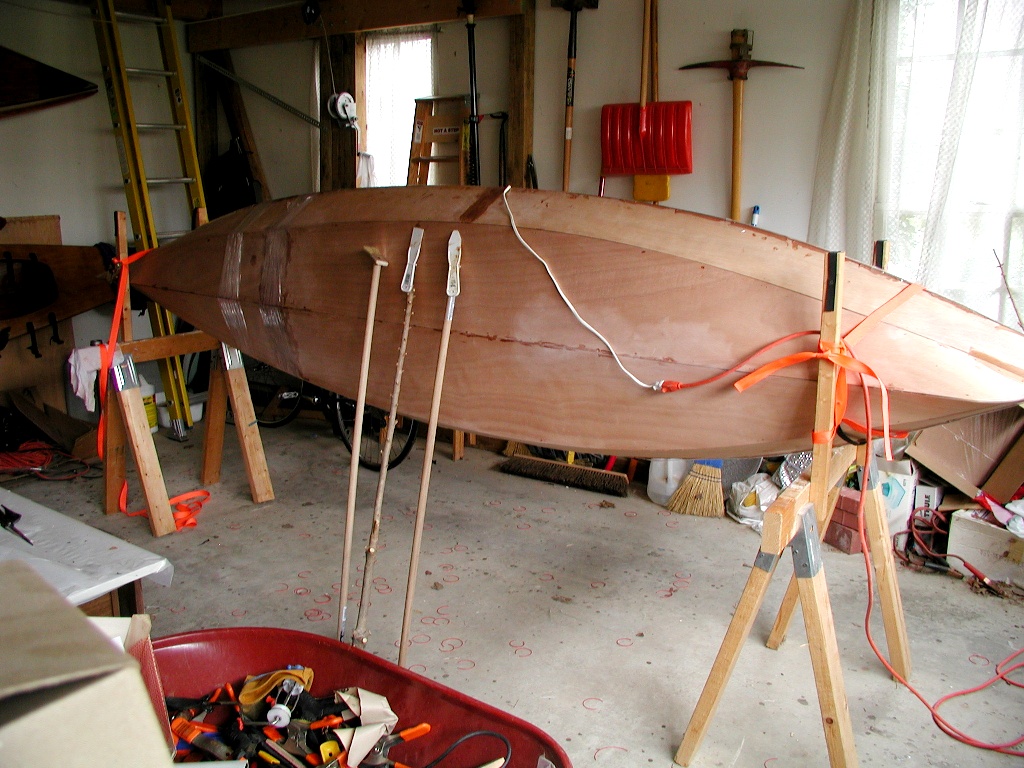
My Wood Duck double build (my first) was proceeding quite nicely until I got to this stage today. The previously unused syringe I'd been saving for this turned out to be very stiff, and I was unable to have much control over the output. Instead of the nice, steady bead of epoxy I'd imagined laying down, I got starts and stops--big blobs, then resistance. I don't think it was the epoxy because those blobs ran very smoothly and freely down the inside of the hull (thankfully I had a brand new bottle of white vinegar handy). I probably should have stopped and tried one of the older, salvaged syringes I still had, but I didn't.
So, I'm not confident the tack welds are really sufficient for me to move on, and I'm thinking of leaving the copper stitches in, propping the boat up on its side, and tacking again tomorrow from the inside, this time with the benefit of gravity and a new syringe. After all that sets up, I'll remove the stitches and do the fillets and taping per the manual.
Anyone have this problem before? Anyone have tips or advice? If I'm missing something or on the wrong track, I hope one of you experienced builders will let me know.
Dave
4 replies:
RE: WD2--tacking hull to deck
What the anonymous person said. And just in case you're still not convinced about the strength of the tacks, here's a picture of what I used on my WD12 build (click for larger picture):

As you can see, my tacks were just smears of epoxy in the crack between the pieces of wood. Yours sound much stronger.
If you're still feeling nervous, you can try this:

Wrap the deck & hull in plastic shrink wrap (available at packaging & mailing supply stores). I did it before I took out the wires and left it on until the hull was glued on the inside.
So be happy, don't worry and deck that duck.
Laszlo
RE: WD2--tacking hull to deck
That was me, I just got autologged out for letting the page sit too long, I think. Another thing I wanted to add, if it's still relevant and you havent gone ahead and tacked, is that it's also good to tape along the seams on the outside in any spots where the planks have gaps, to help keep that tack where it belongs. It's a little awkward with the stitches to contend with, but worthwhile.
alrotch
RE: WD2--tacking hull to deck
Thanks, Laszlo. I'd read your blog before I started building, and I appreciate your having created it. I just finished the deck to hull tacks with the boat on its side, and I really think it's much easier and more efficient than the method suggested in the manual. I did tape the outside wherever I could see light coming thru--thanks, alrotch.
To summarize for anyone who might want to try this, after stitching the deck and hull back together dry, I turned the boat on its side, applied a ketchup thickness mix to the hull to deck seam, waited about 10 minutes for gravity to help it work its way into the seam, wiped off any excess, then turned the boat onto its other side. I then repeated the process for that seam. When done I checked the first side for any runs and found very few. It all seemed way easier than the manual's method of trying to apply epoxy to the 1/8" edge of the hull before stitching the deck on top of it. It's way harder to apply the epoxy that way, and you have all that goop in the way while you're restitching.
Tomorrow I'll be removing the stitches for the last time, then filleting and taping those seams, and I'll have a boat that's ready for sanding. Can't wait.
Dave


RE: WD2--tacking hull to deck
» Submitted by - Sat, 2/2/13 » 12:42 AM
Definitely have the boat on its side, both to avoid the hassle of the tack running out of the seams and to ensure that if it flows anywhere it's going to run along the seam. Also, don't be afraid to mix the epoxy a little thicker for those tacks, to help prevent it from moving too much.
DEFINITELY tack from the inside, putting the epoxy into the V formed by the beveled edges of the planks where they meet. The bead I made didn't even stick up above the level of this V: that got filled later in the (wonderfully awkward and messy) fillet and tape step. I did mine in two sessions, letting the tack set on one side before flipping the boat and tacking the other side.
I found the syringes were great to work with. Try to work them a little before you load them with epoxy, just to get a feel for the particular one you're using. Sounds silly, but I felt it helped if my fingers had an immediate memory of how hard to push to get the plunger moving. Also, notice there's often a bit of a "spring effect" where the epoxy tends to keep coming after you've stopped pushing the plunger.
If you're feeling insecure about the strength of the tack, remind yourself that the molecular bond between properly mixed and cured epoxy and wood is stronger than that between wood fibers. This little mantra often helped me, that and the one that says there's practically nothing short of running over your build with a car that you can't fix in process.
Steady on Duck person!