Builders' Forum |
|
| ↓ Scroll to Last Comment ↓ | Forum Guidelines | Builders' Forum | |
Yup, I'm not done with the second, the first needs work and I'm starting a third...Great Auk 14.
I sold my 13' plastic boat...on Craig's list, in December, and no quibbling :-) . This will help pay for my habit. Now for some newbie stripper questions...
1. The kit comes with a plywood strong back that needs to be assembled. In laying it out it looks much longer than needed, Is this the SOP? Do I glue it together and cut to length?
2. The perfect scarf. Some other companies that won't be named (Redfish) provide full length strips. Not so CLC. I really suck at scarfing, so...help! what's the best method for repeatable scarfing of bead and cove strips?
Dan
17 replies:
RE: 3rd boat
Dan I have just finished an Auk 17 in October from a CLC Kit and built an Auk 14 from plans last year. You will have to trim the Strong back box beam to lenght and fit. I glue and power stapled the Strong back togeather. You can not be to carefull here to insure it is straight. I purcahsed 20' Western Red boards locally and made my own bead and cove so I can not be any help with the scarf joints. Good luck and I love to paddle these boats.
Hagen
RE: 3rd boat
Lou, power miter saw sounds like a great idea.
Hagen, do you have pictures of either of your Auk builds? I'd love to see them.
Dan
RE: 3rd boat
Dan,
I have never postsd a photo before on this site. I hope this works.
My miter saw is set at a 60 deg. angle. The scarf is perfect. No gaps at all. The Tite Bond glue is stronger than the wood.
Lou
RE: 3rd boat
Do you own a table saw? The mitre tool on the saw usually doesn't go past 45 degrees which is insufficient for a scarf, so build a custom mitre such as a plywood fixture to mount your strips on and use the saw to cut your scarfs. A piece of plywood with a fence mounted at the correct angle, and a strip of hardwood such as oak that will fit into the slot in the saw table (like the mitre uses). Clamp the strip to the fence (you can do more than one at a time) and pass thru the blade.
You can also make an adapter that mounts to the existing mitre and use as above, but I prefer a stand alone tool as opposed to one that adapts another tool for the job. Use a blade made to cut plywood veneers or other finish cut type blade in your saw to get a very fine cut.
RE: 3rd boat
FnF,
I do have a table saw along with a miter saw, both cheap ones. I did notice that about miter saws, some will go to 50 degrees, but not more than that. I'm really only looking to make some full length hull strips. I think they can just be butted so I'm not sure the scarf really has to be all that strong.
Dan
RE: 3rd boat
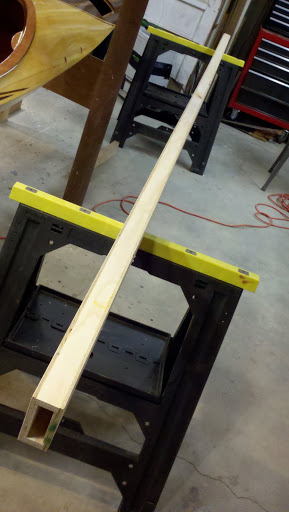
Ok. First picture...

and yes, that is a little bend on the far end. I can straighten it easily, right?
Dan
RE: 3rd boat
It's very easy to adapt your miter saw to cut sharper angles than 45 degrees. Make an auxiliary fence from wood that is attached perpendicular to the factory fence. Use a clamp to attach it to the saw, and cut as pointy as you like!
Cheers, Pat
RE: 3rd boat
Dan: you can straighten your strong back easily. Take a string either down the center or pick an edge of the strong back to find out exactly where the bend is the most pronounced. I would then cut completely thru the side wall of the strong back and force a shim into this cut until the string show it to be straight. does not hurt to put a bit of glue on the shim at this time. Be sure to lay the strong back out first. The next step is the place the forms on the strong back after the forms are in their general location I then place a sister board (scab) on the strong back that goes from form lay out to form lay out. remember to reduce this scab up the thickness of the form1/2" or so. the scab is then glued and stapled with an air gun, you could use sheet rock screws. This exact thing happen to me and the boat turned out fine. If I knew how to port phots I woud attach one showing this exact thing. Hagen
RE: 3rd boat
I got myself a better miter saw for xmas...10" Hitachi vs my old 8" Ryobi, so once I get the other boats out of the way I'll set up a station for it.
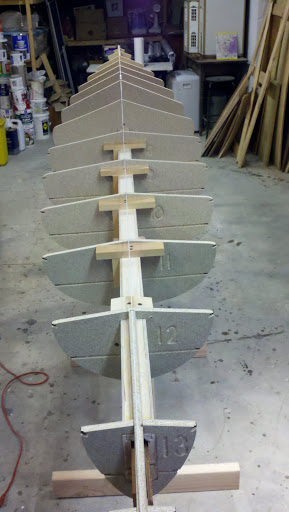
I'm still futzing with laying out the strong back. It's not straight by about a 1/4". This is going to take some work. I've been watching the videos in the tip section and see that Nick is using the spacer and wedge system for locating the forms. I'm wondering if this is the way to go. The particle board forms seem real brittle and I can see splitting them easily.
Dan
RE: 3rd boat
Dan
I just started building a Petrel. I am using the spacer blocks and wedge system.
My strong back has about the same bend in it as yours. As soon as I set the wedges every thing went straight. As long as you make sure that all the spacer blocks are good and square, every thing will pull straight. It's like magic.
www.louskayakworks3.blogspot.com
Lou
RE: 3rd boat
Lou and all,
I tried the spacer and wedge method by first buying what I thought was straight 1x4s from the local big box home improvement store. I screwed a few together then cut to length. They promptly warped like a pretzel.
I then went on to the old cleat method using some old, clear 1x that I had laying around. This worked out fine. Much less nerve wracking dealing with small bits rather than trying to line up the whole thing at once.

Next I have to scarf together some sheer strips and decide on a pattern for the hull (and deck)
RE: 3rd boat
The 2 x 4 aluminum strongback that Nick Schade shows on his Petral build on the CLC builders tips website is the way to go. I just bought a 2 x 4 aluminum square tube 12 ft. long at a metal salvage dealer for $26.00. Also the way he shows doing scarf joints with a belt sander is the way I've done it for years, just set your angle once then go.
RE: 3rd boat
joebd5,
I was looking at that belt sander set up. It looks like a vertical belt with a table and fence. Or am I wrong about that?
Dan
RE: 3rd boat
Nicks is a horizontal oscillating belt table sander, its pretty expensive. I modified a cheap $99 table sander by turning it sideways, and building a fence that I can adjust tofrom 0-90 degrees
RE: 3rd boat
Wicks Aircraft Supply (www.wicksaircraft.com) sells plans for a scarfing machine for $12.00 that you build with an old electric motor and a 3" sanding drum. I have one of these also, I use it for scarfing plywood. I've tried the mitre saw method and frankly I thought it was inconsistant and dangerous.


RE: 3rd boat
» Submitted by loube - Sun, 12/5/10 » 7:18 PM
Dan,
That's great that you are on number 3. So am I. WD12 hybird, Guillemot in progress, and just started a Petrel.
I don't know about the strong back in the kits because I build from scratch.
As far as the scarf, I do the through-the-thickness scarf as seen in Nick schades book. ( The Strip Built Sea Kayak ) page 84.
I use a 10 inch power miter saw set at the maximum angle. It works perfect. If you are carefull in selecting matching color strips, the scarf is almost invisable.
Keep us posted on your progress. After your last build, I can't wait to see what you do next.
Lou