
 return to section:
 Day 4, Peeler Skiff for Chesapeake Light Craft.
Today I started by prepping the bottom interior for the next stage of building. First, all of the little stitch holes needed to be drilled out as they had all become completely filled in the process of applying fiberglass. Next, the mortise holes needed to be opened up. I do this by using a 1/4” drill bit to drill through the fiberglass covering the mortise and then running the bit around the edges of the hole to cut away most of the glass. Then I clean the remaining epoxy and glass with a 1/2” square file.
Finally, I sanded the entire surface of the bottom interior. The fiberglass is coated with only one epoxy fill coat so at this point I am not expecting, or trying to get it completely smooth. I am primarily just roughing up the surface to ensure good adhesion for the joints and coats to come. The fiberglass is overlapped in the center which creates a ridge at the edges of the overlap running the full length of the boat. This will be the most difficult part to get flat, so some extra sanding is done along these edges. Care must be taken not to sand away the fiberglass cloth, however, so I stop sanding when I begin to see the bare fibers of the glass coming through. The second photo illustrates the point when sanding should be stopped. A strip of clearly showing weave along the overlapping seam slightly whiter than the sanded areas surrounding can be seen. It will require at least two more epoxy fill coats to get an area like this fair.
Next, I prepped the frames and transom for installation by removing all of the machine tabs and lightly sanding. I use a Shinto rasp to knock off the majority of the tabs and then finish by sanding them completely flush with 80grit on a block of wood. The tenons also needed to be thinned a bit to fit easily into the mortises. I used the Shinto for this job too.
Then I stitched on the frames. The Peeler kit comes with a roll of galvanized steel wire for this job. It can be pulled and twisted very tightly with little fear of breaking the wire. Those of you who have built smaller boats from CLC will have strong memories of the copper wire that breaks so easily. The steel wire is nice, but it would be too strong for the thinner plywood of smaller boats and would likely cause breakage of the thin wood panels.
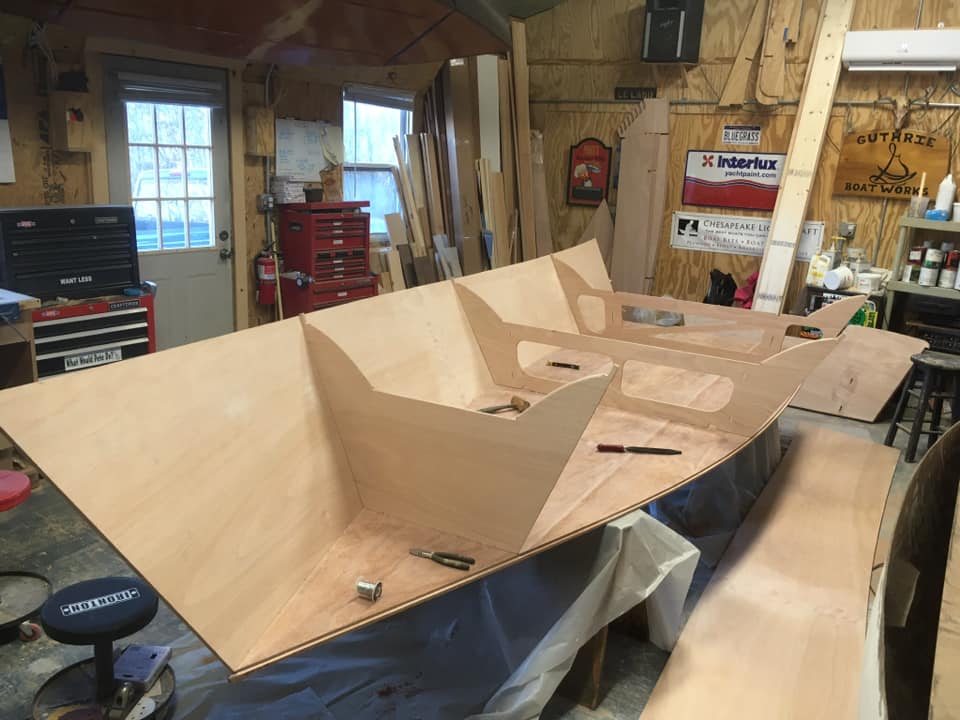
The last thing I was able to squeeze into a half day on a Sunday, was stitching one side panel to the bottom. This is a wiggly long piece and a helper would make it much easier, but I managed alone with the help of a small stool to prop one end on while I got it hanging on the frames. It took some wrestling to get the hull side to seat into the rabbet edge on the bottom, and in some places I employed a small pry bar to lift the side over the rabbet edge. Starting at the stern, all of the wires were installed and tightened, and everything appears to be fitting perfectly.
That’ll do until tomorrow.
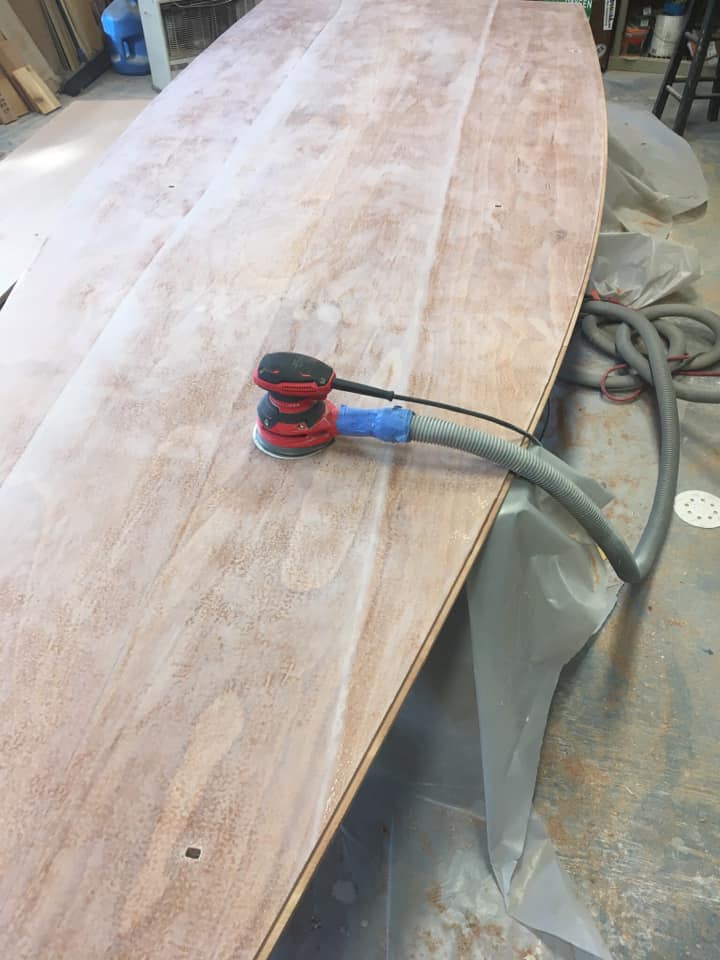
One epoxy fill coat over fiberglass sanded with 80-grit. It should not be perfectly smooth at this point.
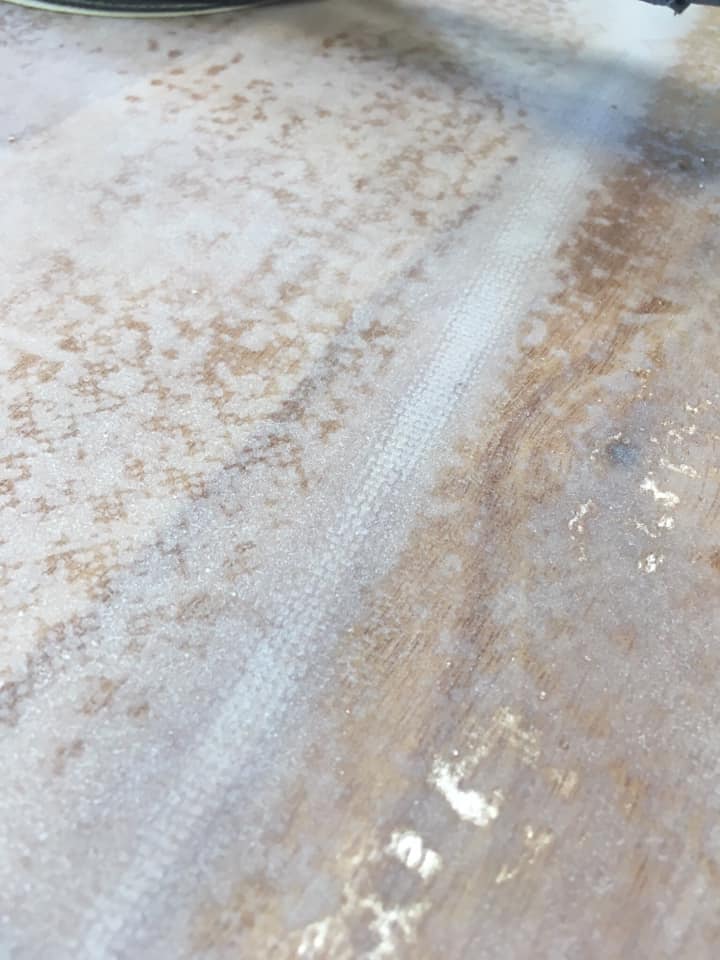
The fiberglass weave showing through at the fiberglass overlap. Stop sanding an area whenever you see this. More sanding will cut away the fibers and strength will decrease.
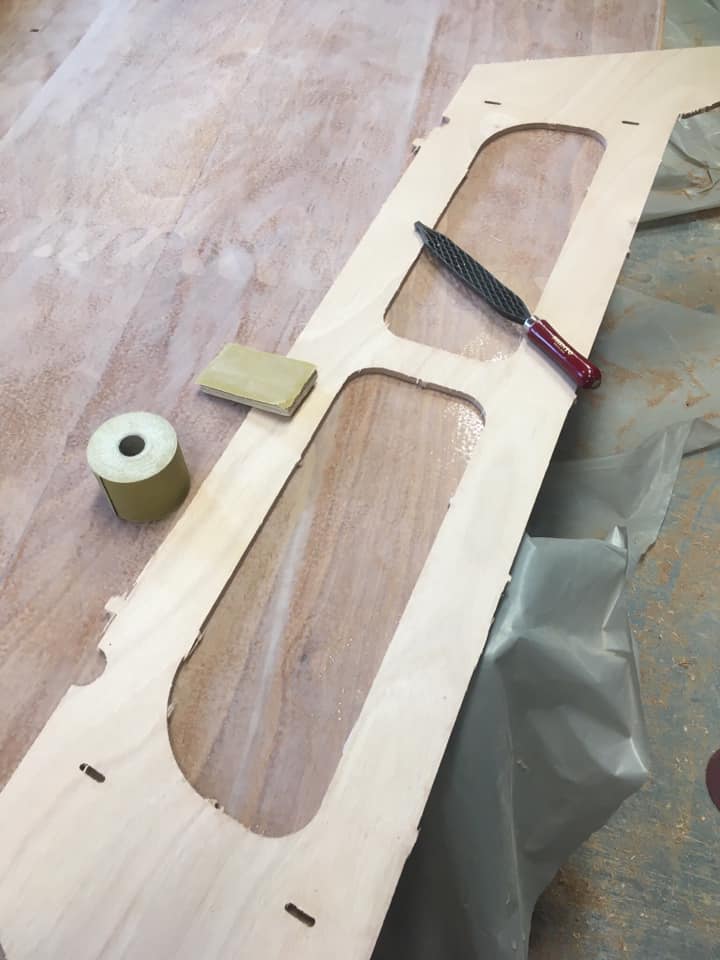
Frame ready for tab removal. I use the Shinto Rasp to remove most of the tab very quickly, then sand them completely flush with 80-grit on a block. Sticky back sandpaper is very expensive, but a roll lasts a very long time, and saves a lot of frustration.
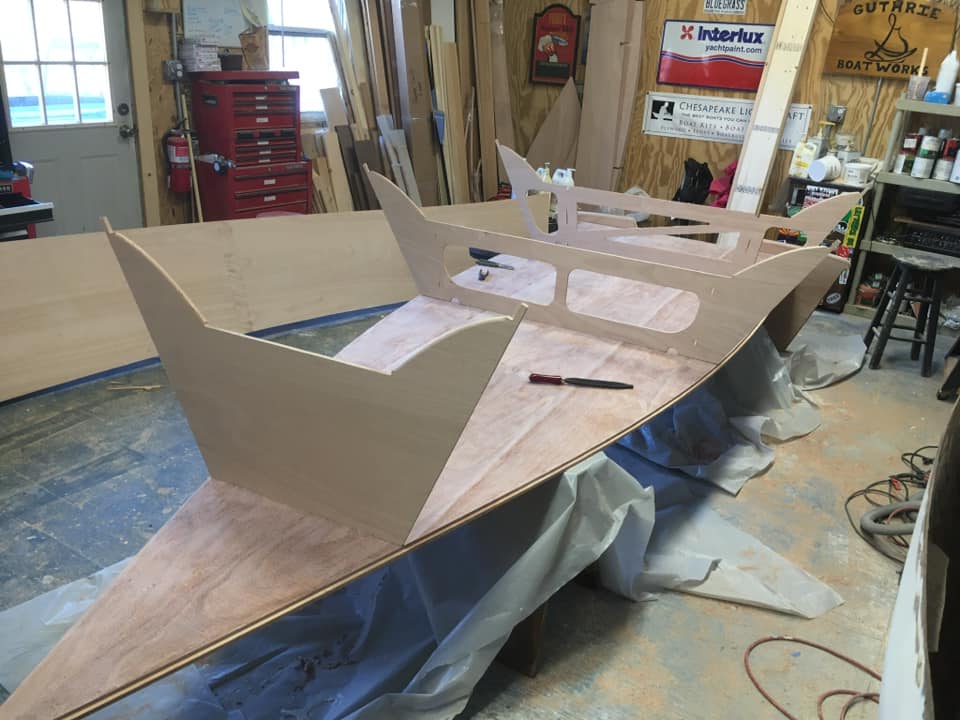
All three frames stitched in place. The upper portions of the frames will be doubled later, so I rounded over one side with the router before installing. The doublers that get glued to these after the seats are installed will need to be rounded over on their complimentary sides. Roundovers like these are impossible to do with a router after assembly, and require rounding by hand with sandpaper. This takes a long time and is difficult to get even. Read ahead in your manuals and make sure you are not missing an easy step that becomes a difficult step if left for later.
The saw horses I use are quite short at only 21” high. This has been uncomfortably low up until this point. Now, if they were any higher I would need a stool to reach over the sheer. I find this to be the right height for most of the boats I work on. Adjustable rolling stools are perfect for all of the work on the sides. With so much left to do, it is always a good idea to take it easy on yourself whenever you can.


