Still Madness After All These Months (A Proa Update)
Lots of emails in my box asking for an update on Madness, my 31-foot Pacific proa. See more drawings and read about the history of the project here and here. Scroll down this page for the complete build update.
Last time I promised a summary of what such a thing costs to build, and here's what I've got in it so far:

I've used typical marine discounter prices. $6000 in materials is a ton of money by kayak kit standards, but by homebuilt-performance-multihull standards: It's peanuts. Did I read that right?!? $80,000 for an average 30-footer? I think I'm going to come in for a landing with a materials bill of around $8000. Mast, rigging, sails, and outfitting will probably add another $8000-$9000.
A couple of things in the numbers are worthy of comment. $768 for peel ply is high-roller money to me. But it's strategic. Using peel ply for almost every fiberglassed surface allowed me to achieve finish-quality surfaces in one step---no recoating of the fiberglass and very little sanding, and less epoxy was used. If I assign even the meanest hourly wage (and I've been guilty of that), I've saved multiples of that number in labor. And weight and cost in epoxy.
Also unlike a kayak kit, there's a lot of odd fiberglass types and sizes. A goal of this project has been to create an ultra-high-performance sailboat hull without any exotic materials. (I'm looking at YOU, carbon fiber. Maybe that's how they get to $80,000 so quickly on that Farrier trimaran estimate.) I've saved a bundle by staying away from the graphite glitter. But to hold this lashup together at 15 or 20 knots, I still need a few hundred bucks in high-modulus fiberglass supplies of a kind that isn't usually kicking around the home-builder's garage.
We've weighed everything with CLC's digital scale. As of this writing, the main hull weighs about 340 pounds, the crossbeams 50 pounds each, and the little hull about 100 pounds. All will gain weight, but I'm still safely on budget, which allows for a 1000-pound (454kg) sail-away weight. (For perspective, PocketShip, at 15 feet, has a sail-away weight of about 850 pounds.)
I finally found a mast. A persistent CraigsList search uncovered a decent aluminum section, which I'll keep as a spare. Russell Brown found me a factory-second carbon stick for $800, plus $500 in shipping. Spendy, but only a third what a bespoke carbon tube would have cost me. That was a lucky find.
Here are some progress photos, to bring us up to date.

There was much tedious fiddling with the rudders. With the rudders finished, we could finally build the trunks that hold them. In this photo, a rudder is being tested in its trunk. The trunk is clamped to the work bench. In the trunk the rudder slides against graphite-coated bearings.

Once the trunks were assembled, they could be set into the lower hull and 'glassed in place. The hull is so narrow that the trunks had to be installed early, before the side panels were stitched on. Only a trained Rhesus monkey could have reached the bottoms of the trunks for 'glass work once the sides were on. In this photo, Carey is actually rotating the rudder blade.

At last came the big day when we could attach the side panels to the bilge panels. It wasn't hard to find a crew to wrangle the flexible 6mm side panels into place. It's really cool to assemble a 31-footer in one quick step! That's me aiming the video camera.

Just like a stitch-and-glue kayak, bulkheads were inserted, the sides stitched onto the bottom panels, and fiberglass tape laid in. Unlike the kayak kit, we used some very big, ugly 'glass tape: 26-ounce biaxial. Note the care taken with masking tape and plastic to quarantine the gallons of epoxy required to wet out that stuff.

It was handy to be able to hike the boat over on its side for the fiberglassing work, one side at a time. This photo shows the inside of what will eventually be part of the cabin.

Finishing the epoxy fillets and fiberglass work on the interior left the hull light and stiff, and ambulatory on its own little dolly. It got stashed in the unfinished new CLC shop while we got on with other things for a week or two.

Before the exterior was fiberglassed, the flared bows were built up with polyurethane foam. For reasons I won't go into, we also cut off the epoxy-and-plywood heels of the stems and replaced them with foam inserts. The blue foam is just peeking through the filler in spots.

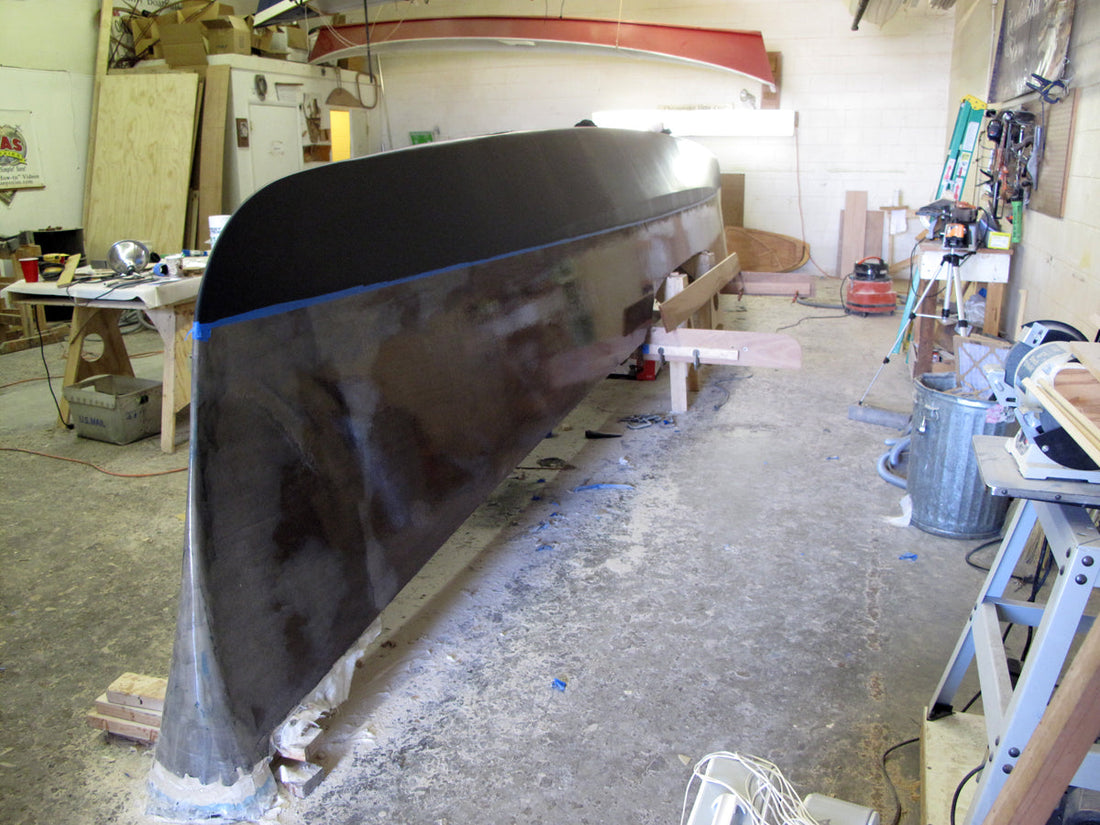
The hull received a single skin of fiberglass, a lot of sanding, and finally a couple coats of bottom paint. Once flipped upright, I hope I never see it in this orientation again!

Meanwhile, on the benches, CLC boatbuilder Olivier Dupont-Huin has been assembling other parts. This is the sturdy bulkhead on which the mast is stepped.

Some of Olivier's nice carpentry.

This is the bulkhead that separates the cockpit from the cabin. The scooped-out bit is the companionway. This is 6mm plywood, epoxied and ready to be filleted into place.
Stay tuned for more updates!